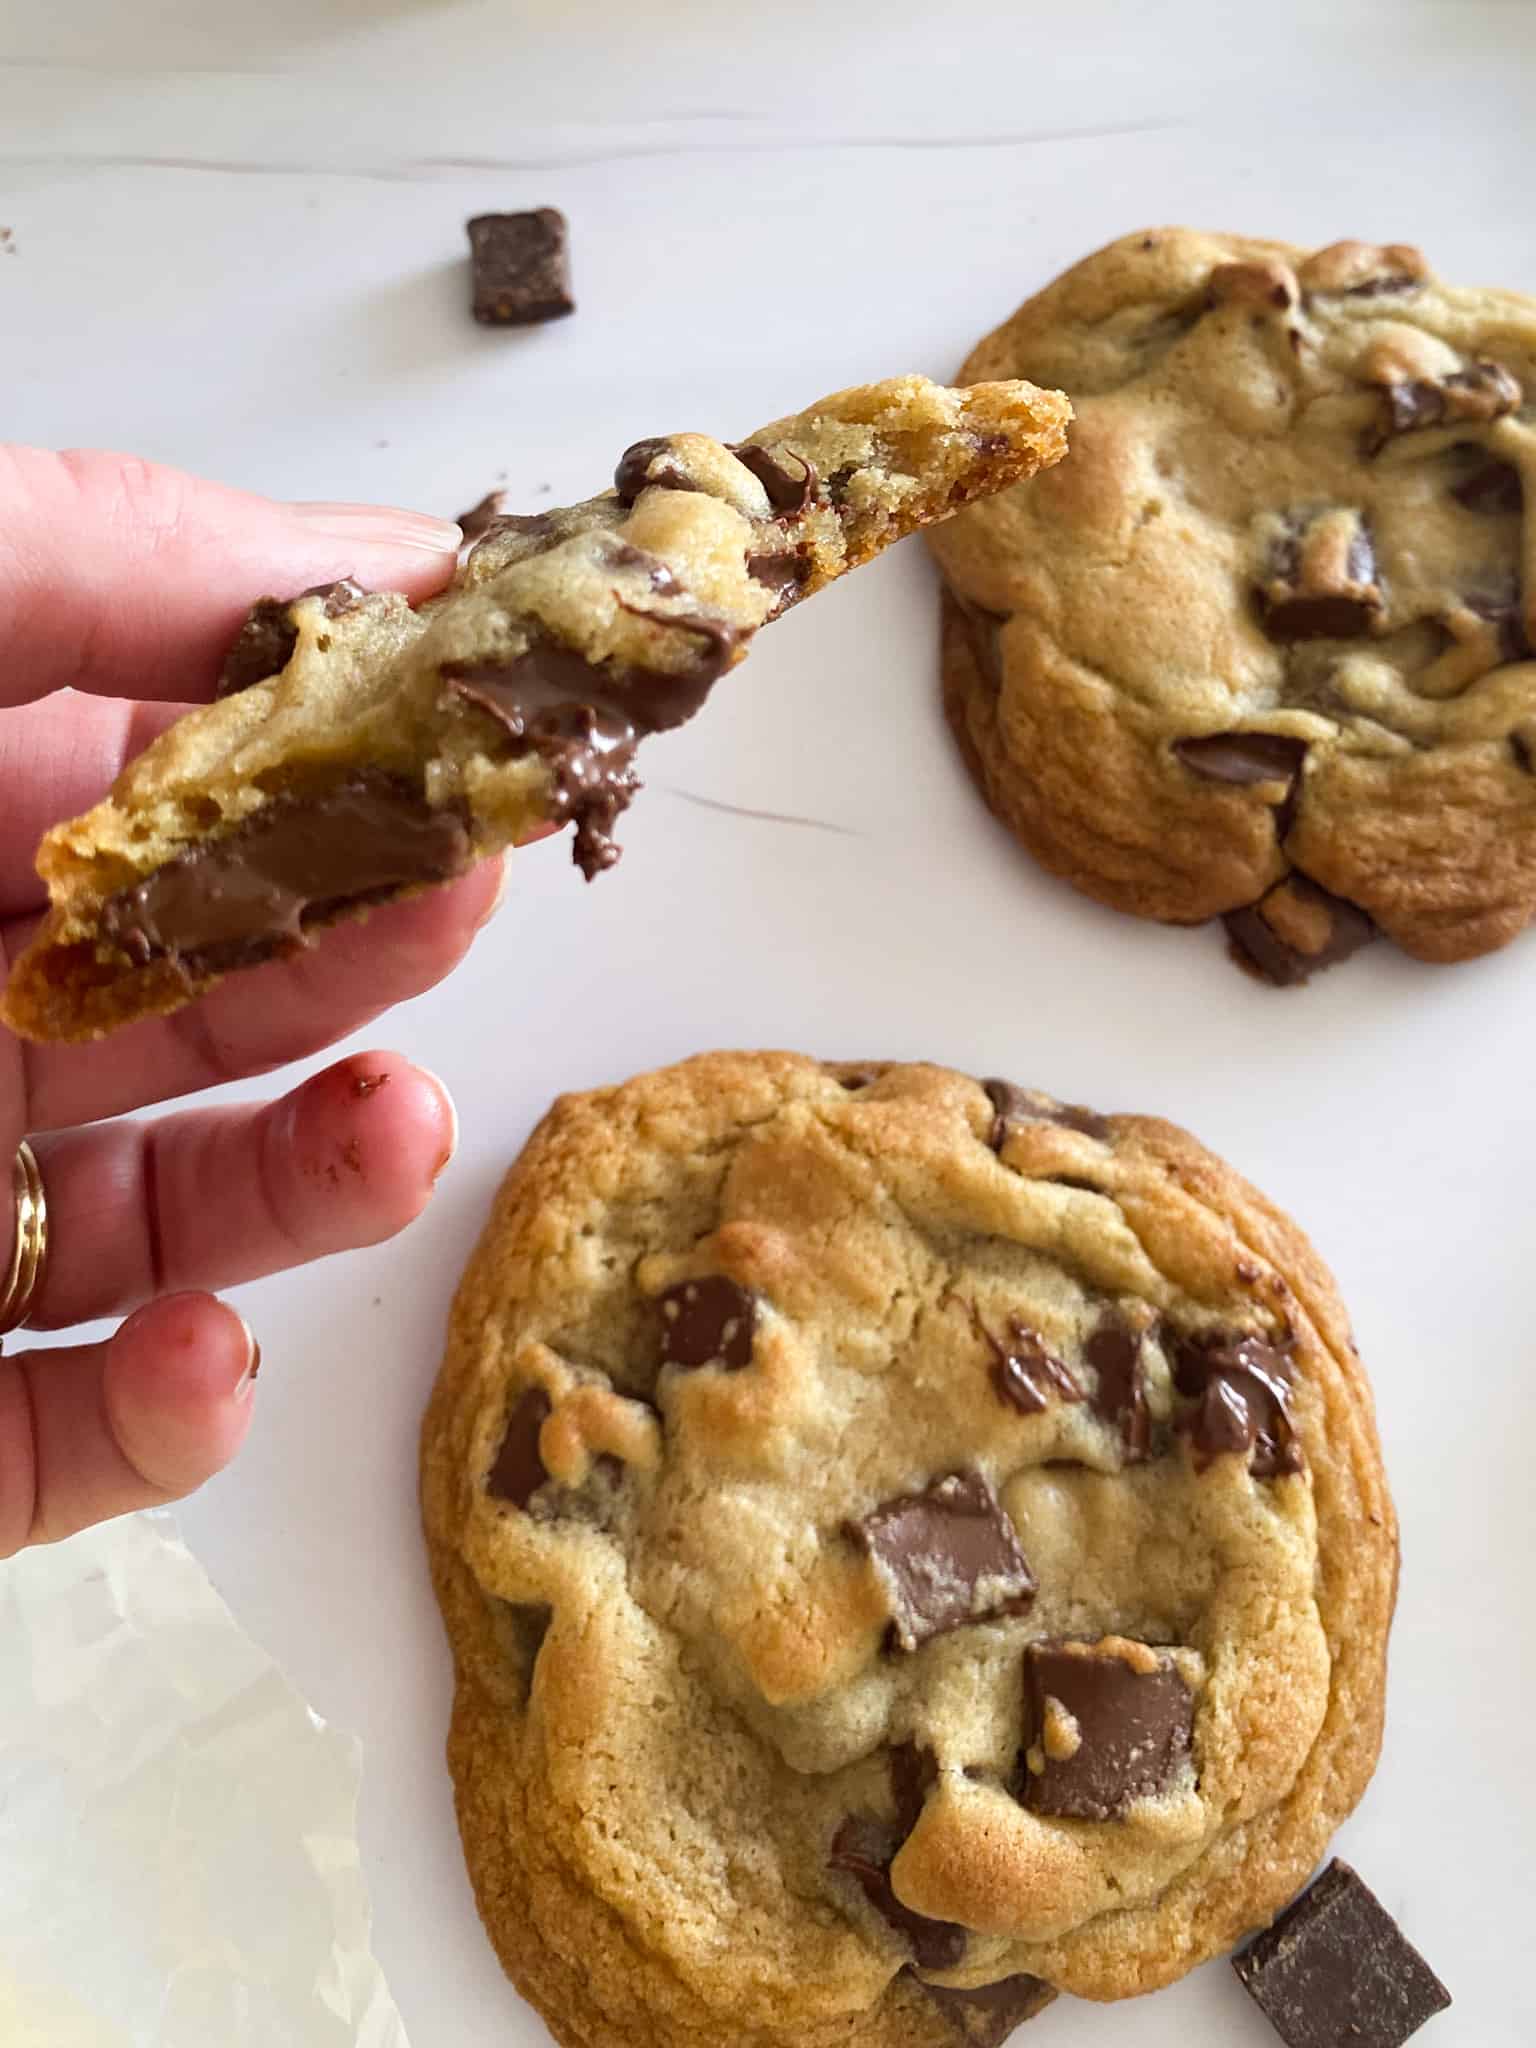
These huge chocolate chip cookies are crisp on outside with a soft, chewy, and gooey center. Served warm from the oven they are the ultimate dessert cookie that’s loaded with melted chocolate chunks and subtle bits of toffee. It truly is the perfect chocolate chip cookie that will satisfy any sweet tooth.
Missouri Girl Home was created because of this very cookie. Friends and co-workers constantly requested the recipe and I quickly realized that all the secrets I learned over the years made it difficult to easily share this recipe with others.
So Missouri Girl Home was created specifically to detail the exact steps needed to achieve the perfect gooey chocolate chip cookie to share with family and friends.
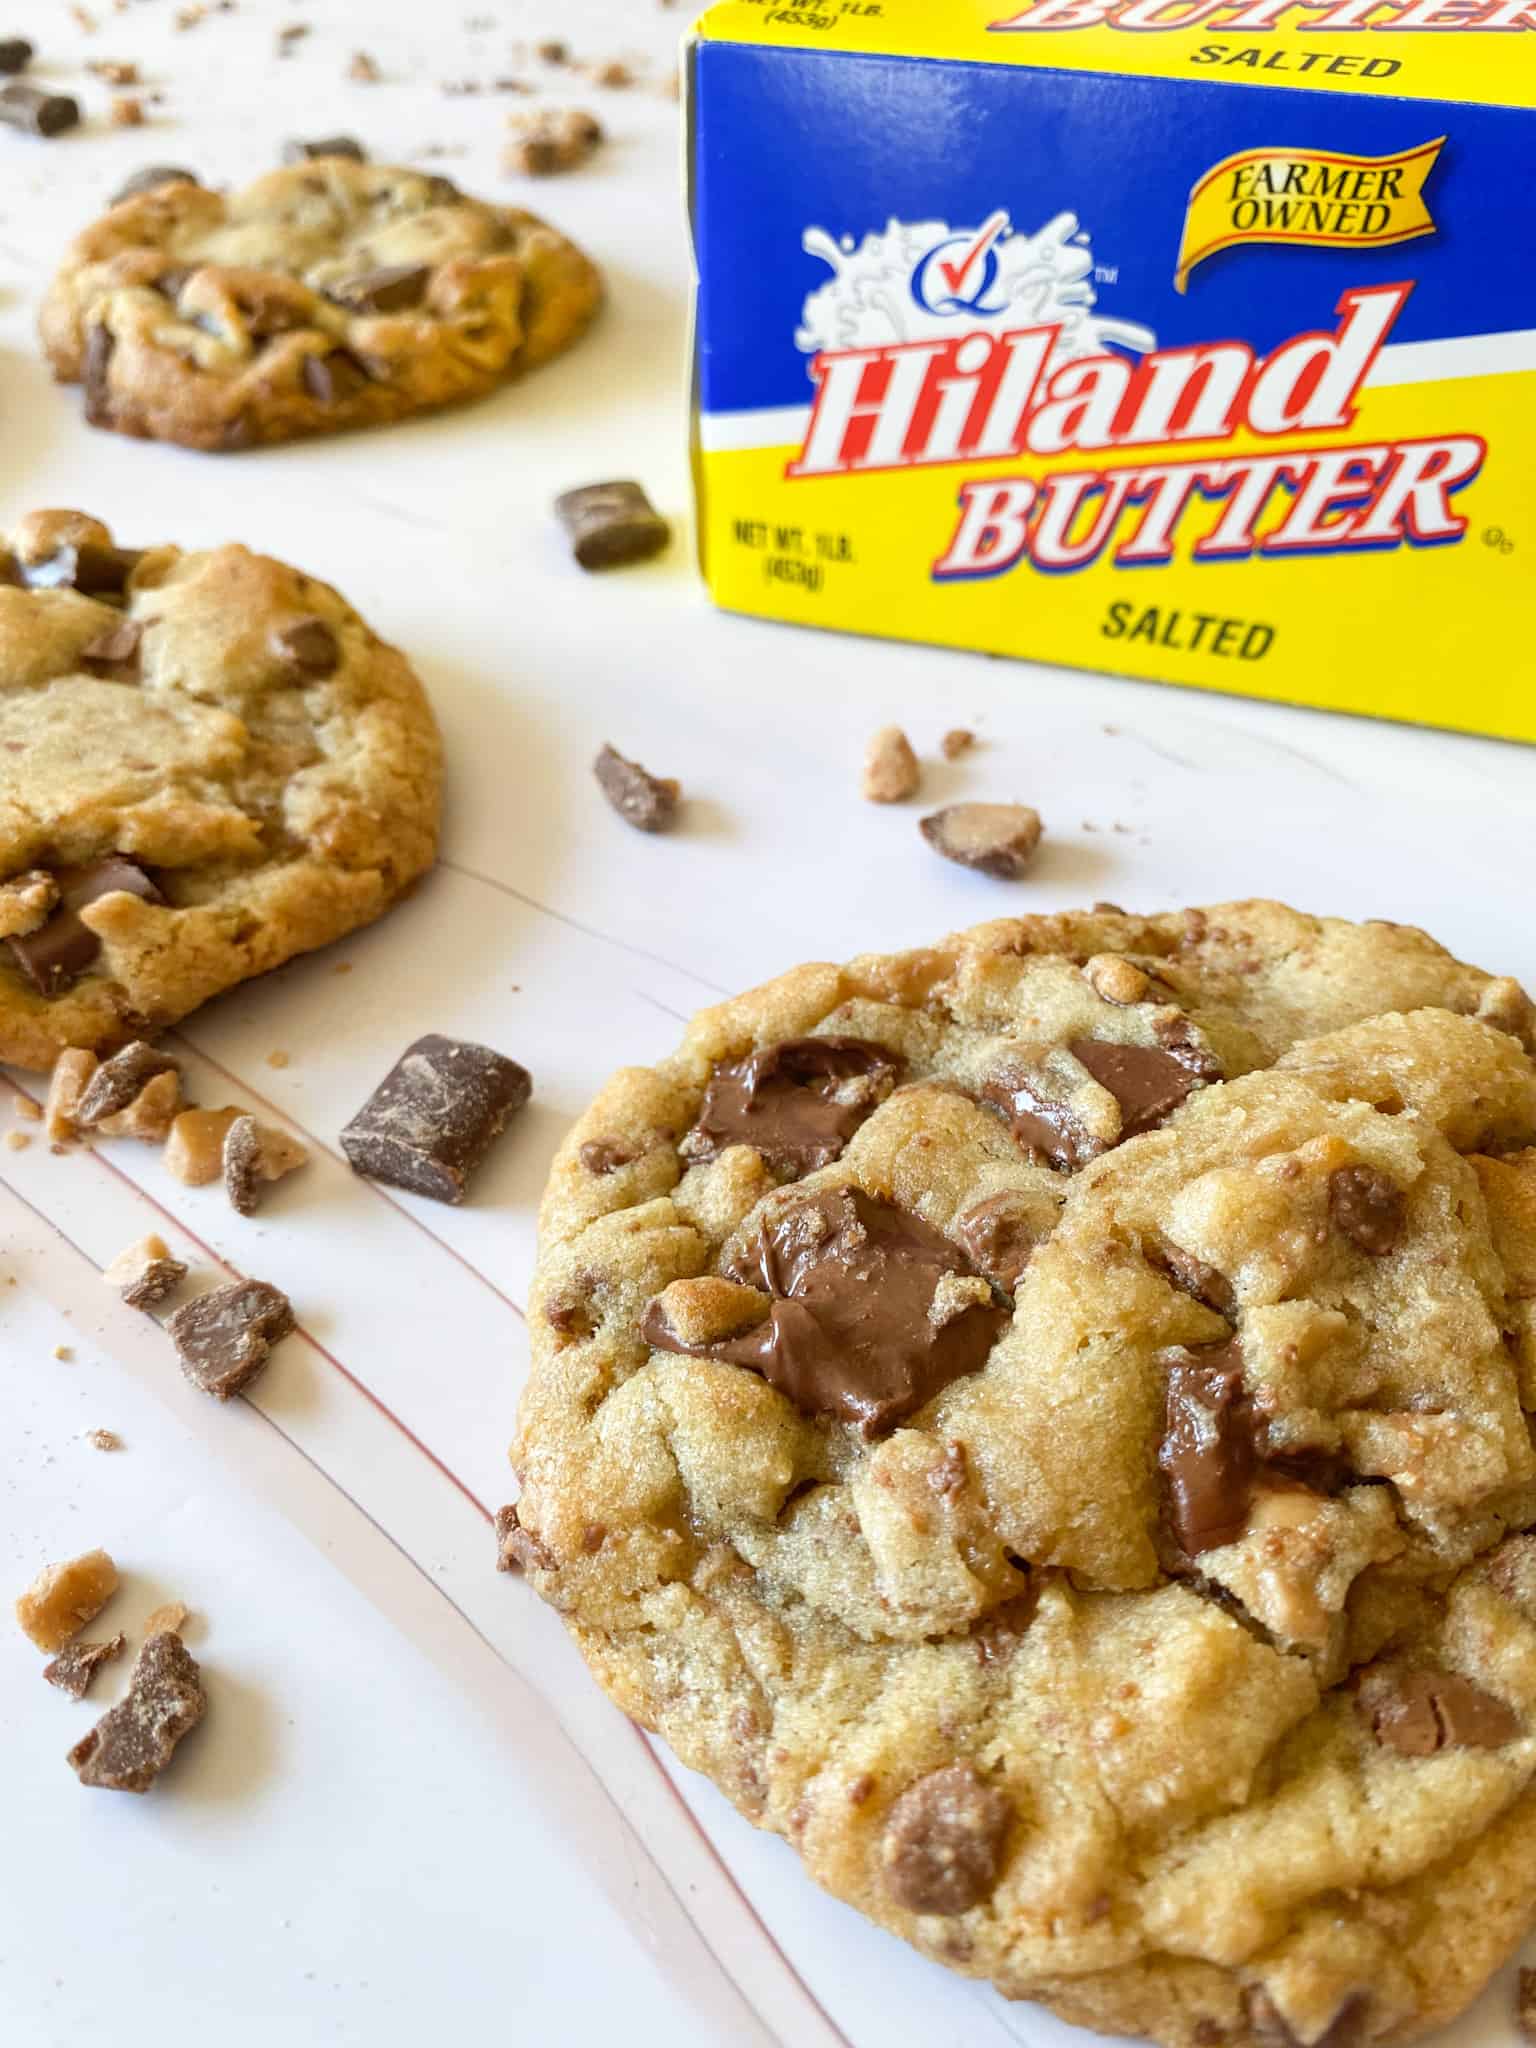
This post is sponsored by Hiland Dairy. All opinions are my own and I only endorse tried and true products that I know and love.

Jump to:
If you ask me what my two favorite foods are, I can answer without hesitation:
1) Buttermilk pancakes (with chocolate chips of course) and
2) Chocolate chip cookies, still warm from the oven.
Yes, I said my TWO favorite foods because I honestly can’t decide between them. I think I might have a bit of a chocolate problem!
These chocolate chip cookies were over 10 years in the making. I baked my first chocolate chip cookie when I was around 11 years old. Initially, I followed the same recipe as many others, the original Tollhouse Chocolate Chip cookie recipe listed on the back of every Nestle Chocolate Chip bag. I made them so much that my brother started volunteering me for the local bake sales.
Over the years I slowly began making changes to the original recipe until it was perfect.
Who knew there were so many considerations that go into making a chocolate chip cookie?
Now, I am giving you my secret recipe and the 8 baking tips that make them so good.
8 Tips for making the perfect gooey chocolate chip cookie
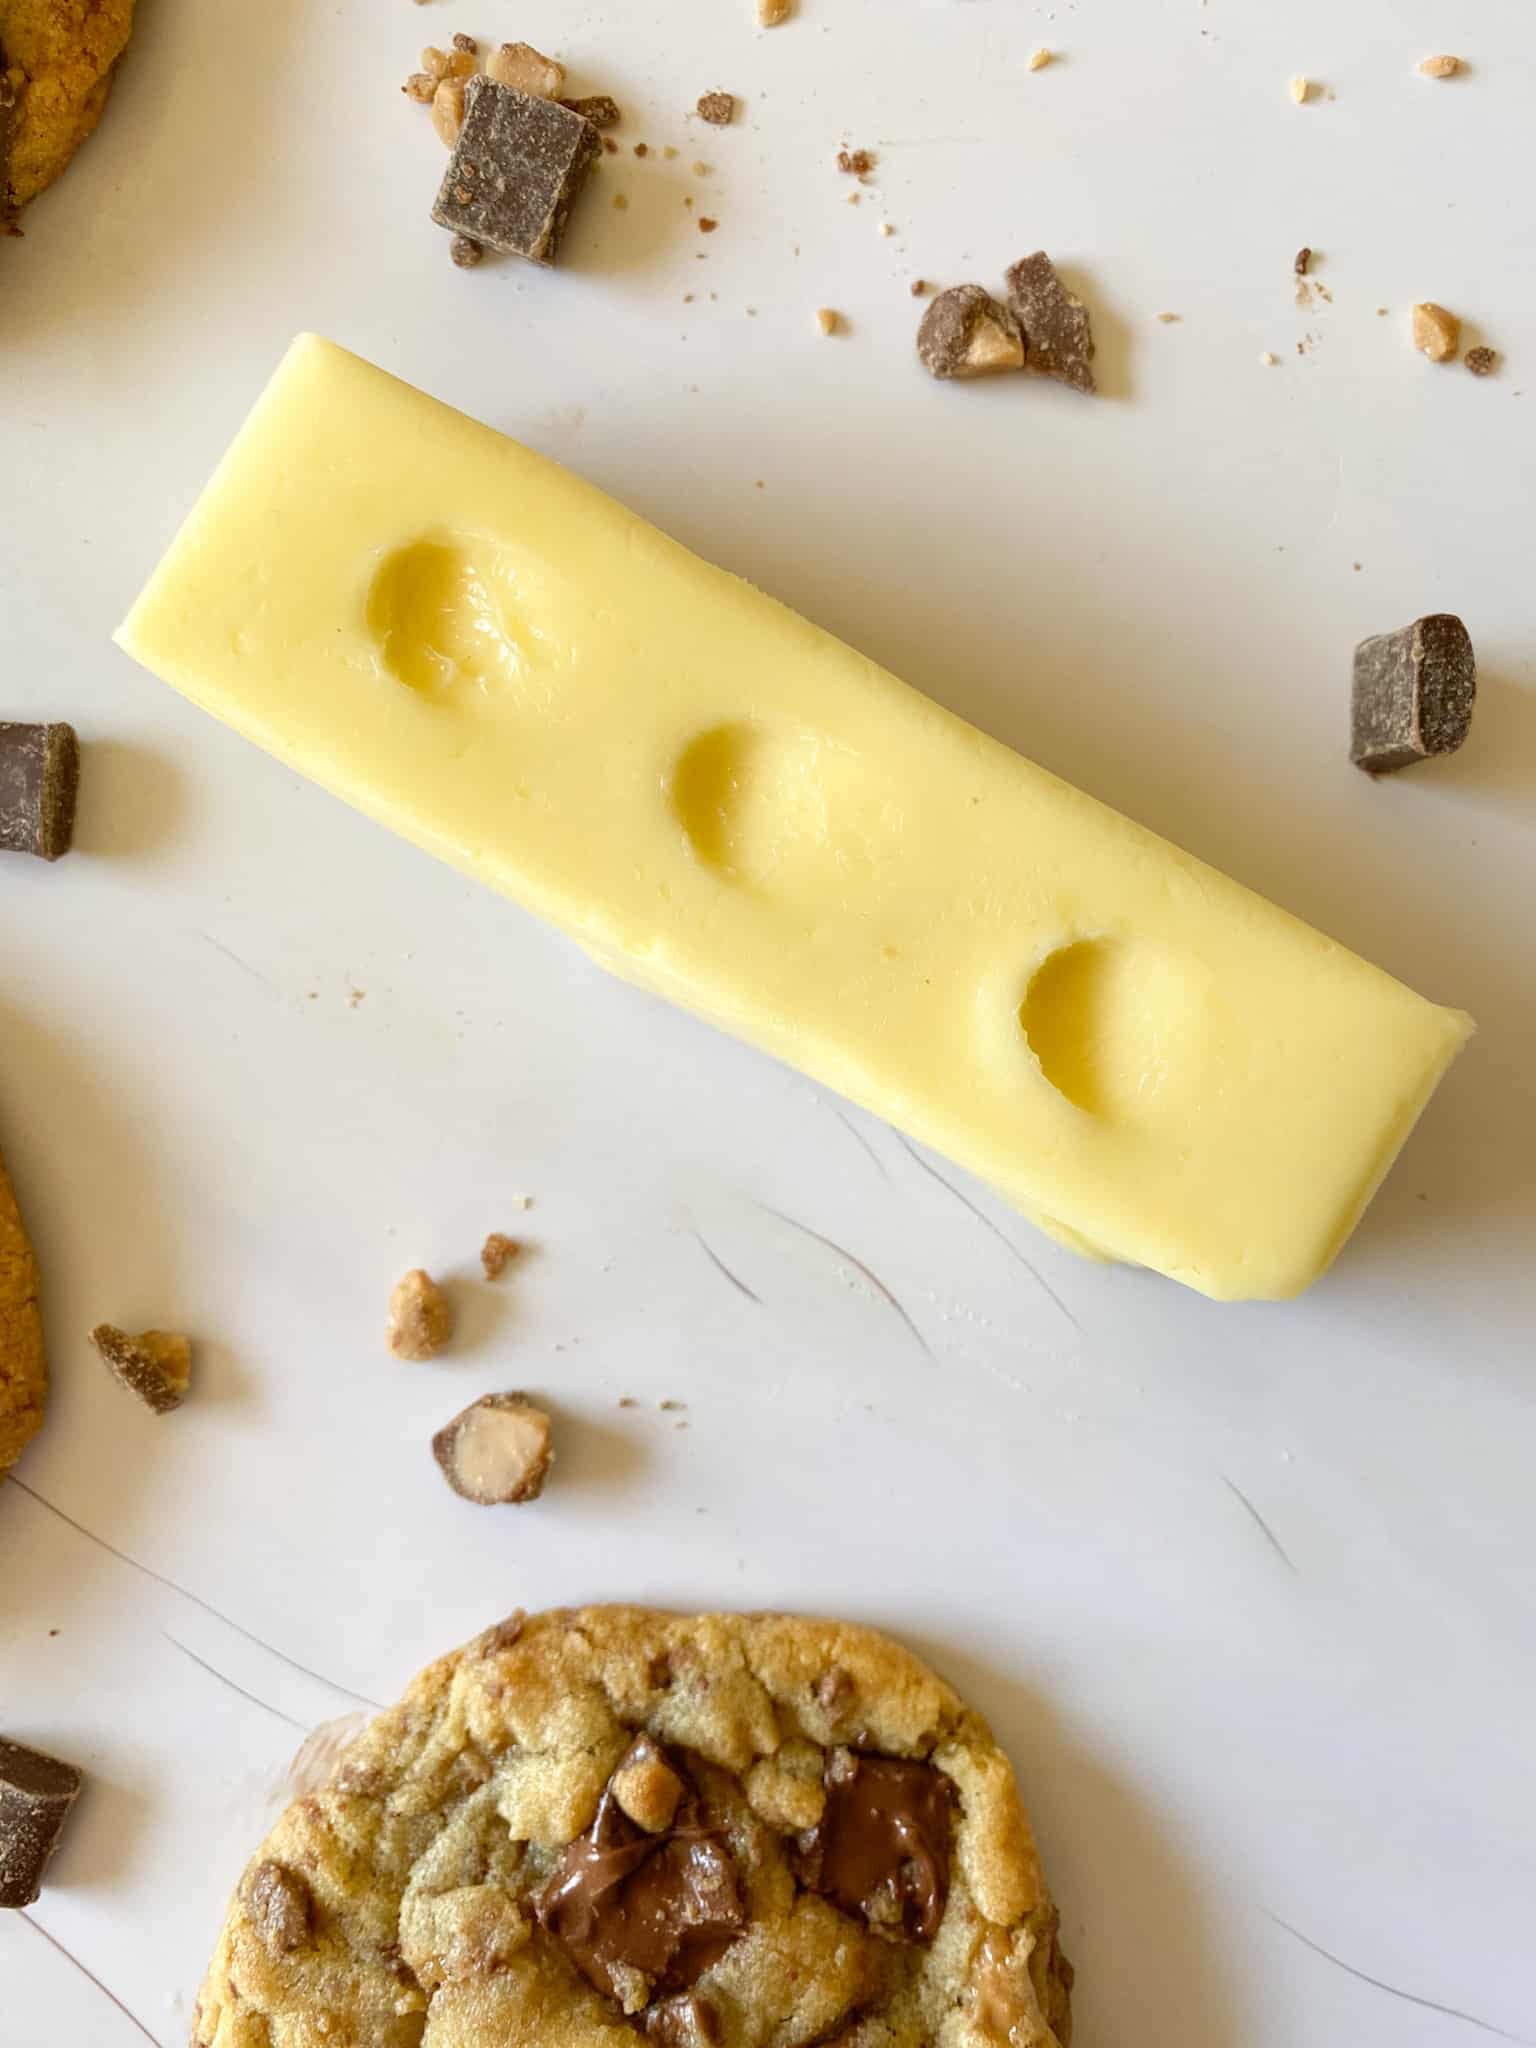
Use quality, perfectly softened butter to make your cookie dough.
The quality and temperature of the butter are very important to the finished product.
Quality Butter
Here in Missouri we have a local dairy manufacturer, Hiland Dairy, that supplies the freshest dairy products to our region. I grew up on this butter so I have always bought it without thinking much of it, until the day I tried another brand and my cookies WERE NOT THE SAME!
Hiland Dairy butter really is THE BEST.
I know not everyone has access to Hiland Dairy butter, but quality is essential.
Perfectly softened butter
The next consideration is the temperature of the butter. You want barely softened butter. Too hard and your butter won’t fully incorporate into the dough, too soft and your cookies will fall and turn into a puddle on your baking sheet. You should be able to easily leave an indention on the butter with your finger but not see any melty drips. If you see dripping butter then start over.
Forget to set out the butter to soften at room temperature?
No problem.
I rarely set my butter out to soften ahead of time anymore. I just DEFROST in the microwave for 40-60 seconds. Times will vary based on your microwave but once you figure out the right time it will rarely vary. My old microwave took exactly 60 seconds but my new one is 43 seconds.
Salted butter vs unsalted butter
The general rule of thumb when baking is to use unsalted butter so you can control the amount of salt in the recipe. I must admit I completely ignore this rule as I have a salty palette and love a little extra salt. If you don’t have salted butter or prefer to use unsalted butter then just add an additional ¼ teaspoon salt to the recipe.

Sugar ratios
The next key ingredient we need to discuss is brown sugar (light, not dark), or more importantly the ratio of light brown sugar to granulated sugar. I like a 2:1 ratio of light brown sugar to granulated sugar which results in a slightly crispier cookie on the outside than with the more traditional 1:1 ratio. Also, higher ratios of brown sugar produce a chewier cookie.
A little extra “heap” of baking soda
This next step is slightly nontraditional. I “heap” the baking soda in the measuring spoon which was a trick I learned from my mother-in-law. Not an exact measurement here (sorry traditionalists) but it works and I don’t have to dirty up an additional measuring spoon (even better). I do realize that this is actually the same as ¾ teaspoon baking soda, but heaping is so much more fun.
Also, remember to use fresh baking soda as it will lose it’s baking power over time.
Type of flour
I use All-Purpose flour for the best gooey chocolate chip cookies. I rarely use other types of flour in my recipes. You may need to add a little extra at the end (yes, I know I just broke another rule). It’s important to add enough flour so that the dough is the right consistency. It should be stiff enough that you have to work a bit to get the chocolate chips incorporated. Remember that hot and humid day? You may need to add a little more flour in this case (again, sorry traditionalists).
Use the right sheet pan
I use a dark, non-stick, greased, airbake cookie sheet. Yes, I said greased. The extra fat helps create that crispy outer edge. Use an air bake pan if you have it but don’t fret if you don’t have one. Darker pans tend to work best but, again, use whatever you have. The dark pan with the extra fat from the cookie spray helps get those crispy edges that we love so much.
Drop method for deep craters
I don’t scoop my cookie dough with a cookie scoop. Instead, I want my cookies to have lots of texture so the drop method works best. Just plop the dough on the pan using a spoon and your finger. They aren’t the most Instagram worthy dough balls but trust me when I say it makes a fantastic cookie. You can also drop the dough into a ⅛ measuring cup to get consistent sized dough balls.
Consider the weather and altitude
Yes, the weather and altitude can, in fact, affect how your cookies bake. Baking them on a very hot and humid day will yield a different cookie than if baked on a cool and dry day. My best cookies have been on the cooler, dry days. Hello Fall baking!
Altitude is another factor that can affect your baking time. I bake at an altitude of about 1,300 feet. In general, higher altitudes will need to make some adjustments. Common adjustments for high altitude baking includes increasing oven temperature by 25 degrees, decreasing baking time, decreasing sugar by ¼ tablespoon, or adding 1 additional tablespoon of flour.
Always under bake your chocolate chip cookies
Finally, the most important thing that makes these chocolate chip cookies gooey and perfect…DO NOT OVER BAKE!!!
Always under bake your chocolate chip cookies.
The timing on the bake is everything. One minute too early and your “gooey” cookies will be raw, one minute too long and your cookies will have a more cake-like texture and will be just another cookie.
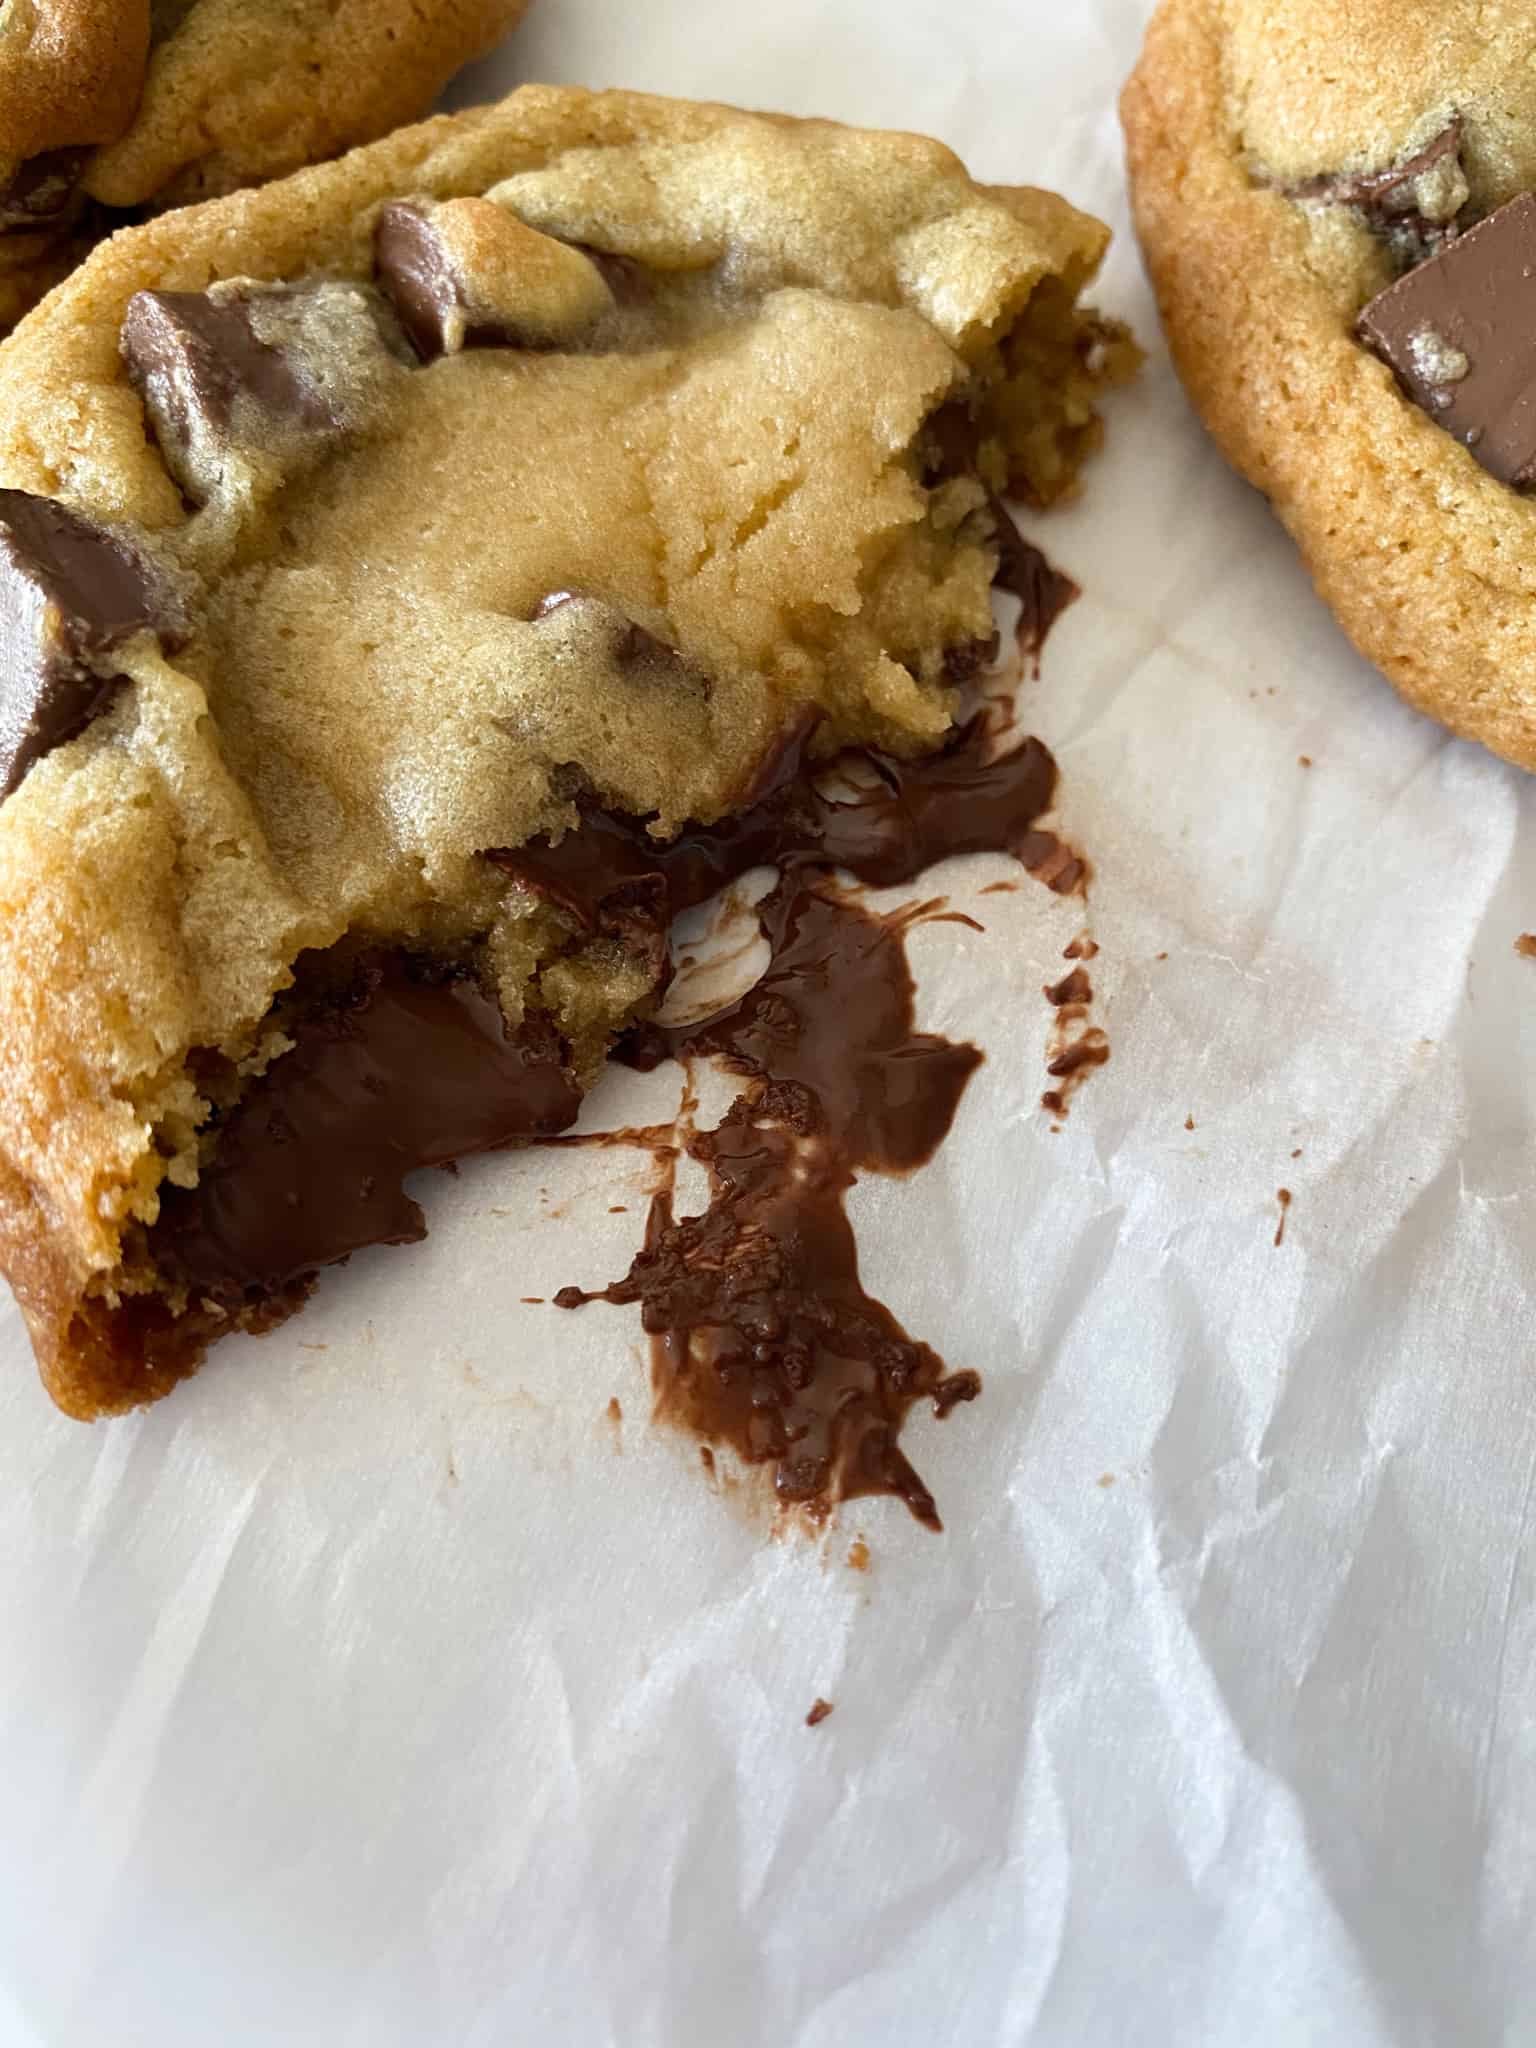
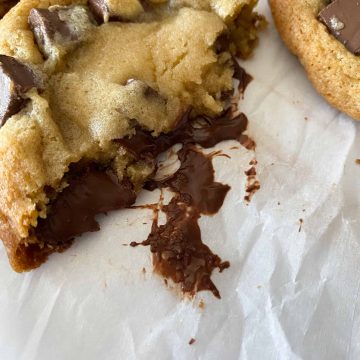
Your cookies are done when they have lightly browned crispy edges, the top is starting to brown in a few spots, and the cookie appears under baked and a little raw in the middle. Don’t let that gooey extra gooey center fool you! You want the cookies to be under baked when you take them out of the oven
When they look like this then it’s take them out of the oven! Immediately! Look close and you will see that the middle of this gooey chocolate chip cookie is not set in the middle but has a slightly darkened and crispy edge with areas of golden brown on the raised surfaces of the cookie. They will continue to bake as they cool on the pan.
Let the cookies sit on the cookie sheet, out of the oven, for an additional 10 minutes to continue baking.
Getting the perfect baking time down may take a little practice and I recommend doing the first bake with just a few cookies until you can find the right time for your oven and altitude. Like pancakes, the second and third batch is always the best.
If you are a cookie fanatic and want to take these cookies to the next level, then check out these S’mores Cookies with Marshmallow Lava or these Hot Chocolate Cookies.
How to make The Missouri Girl Gooey Chocolate Chip Cookie
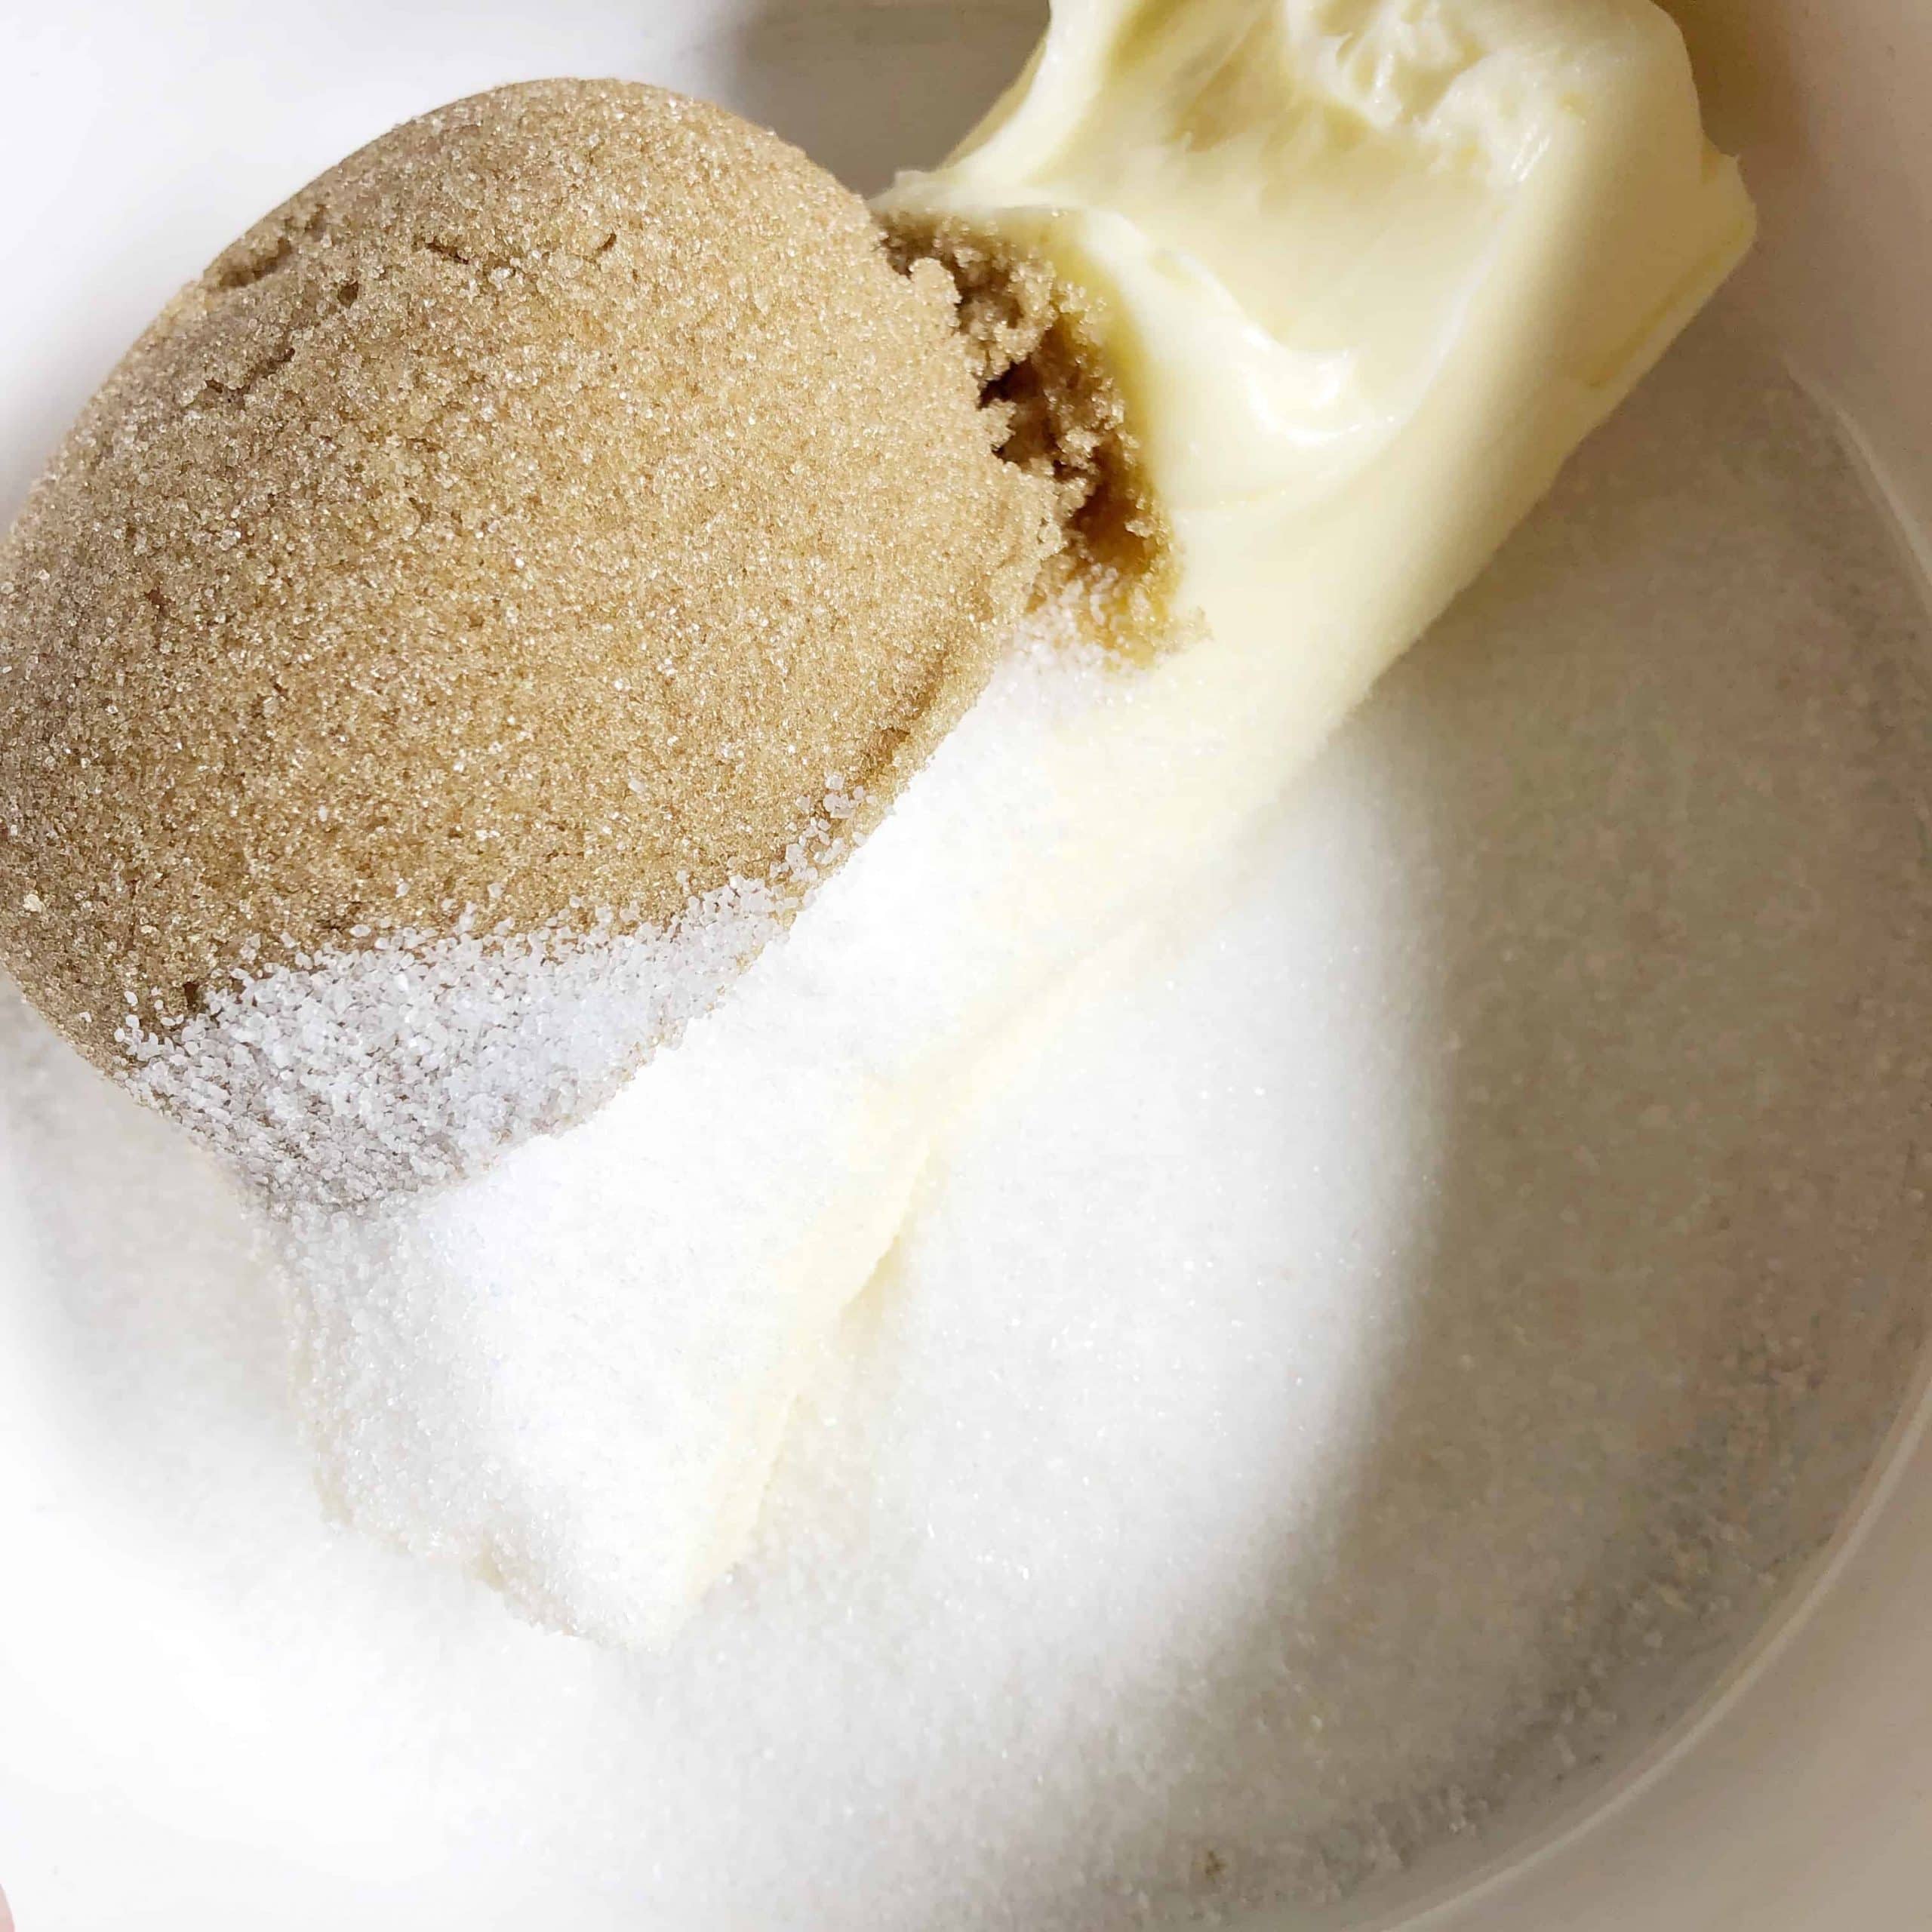
Start with the right butter at the right temperature. See the perfect finger indention? Not a melty drip in sight. Slightly firm is better than too soft. The butter will soften as you mix in the ingredients.
Then add the light brown sugar and granulated sugar. Beat well with a hand held mixer.
Then add your egg and pure vanilla extract (click HERE for my guide on making homemade pure vanilla extract for a fraction of the cost).
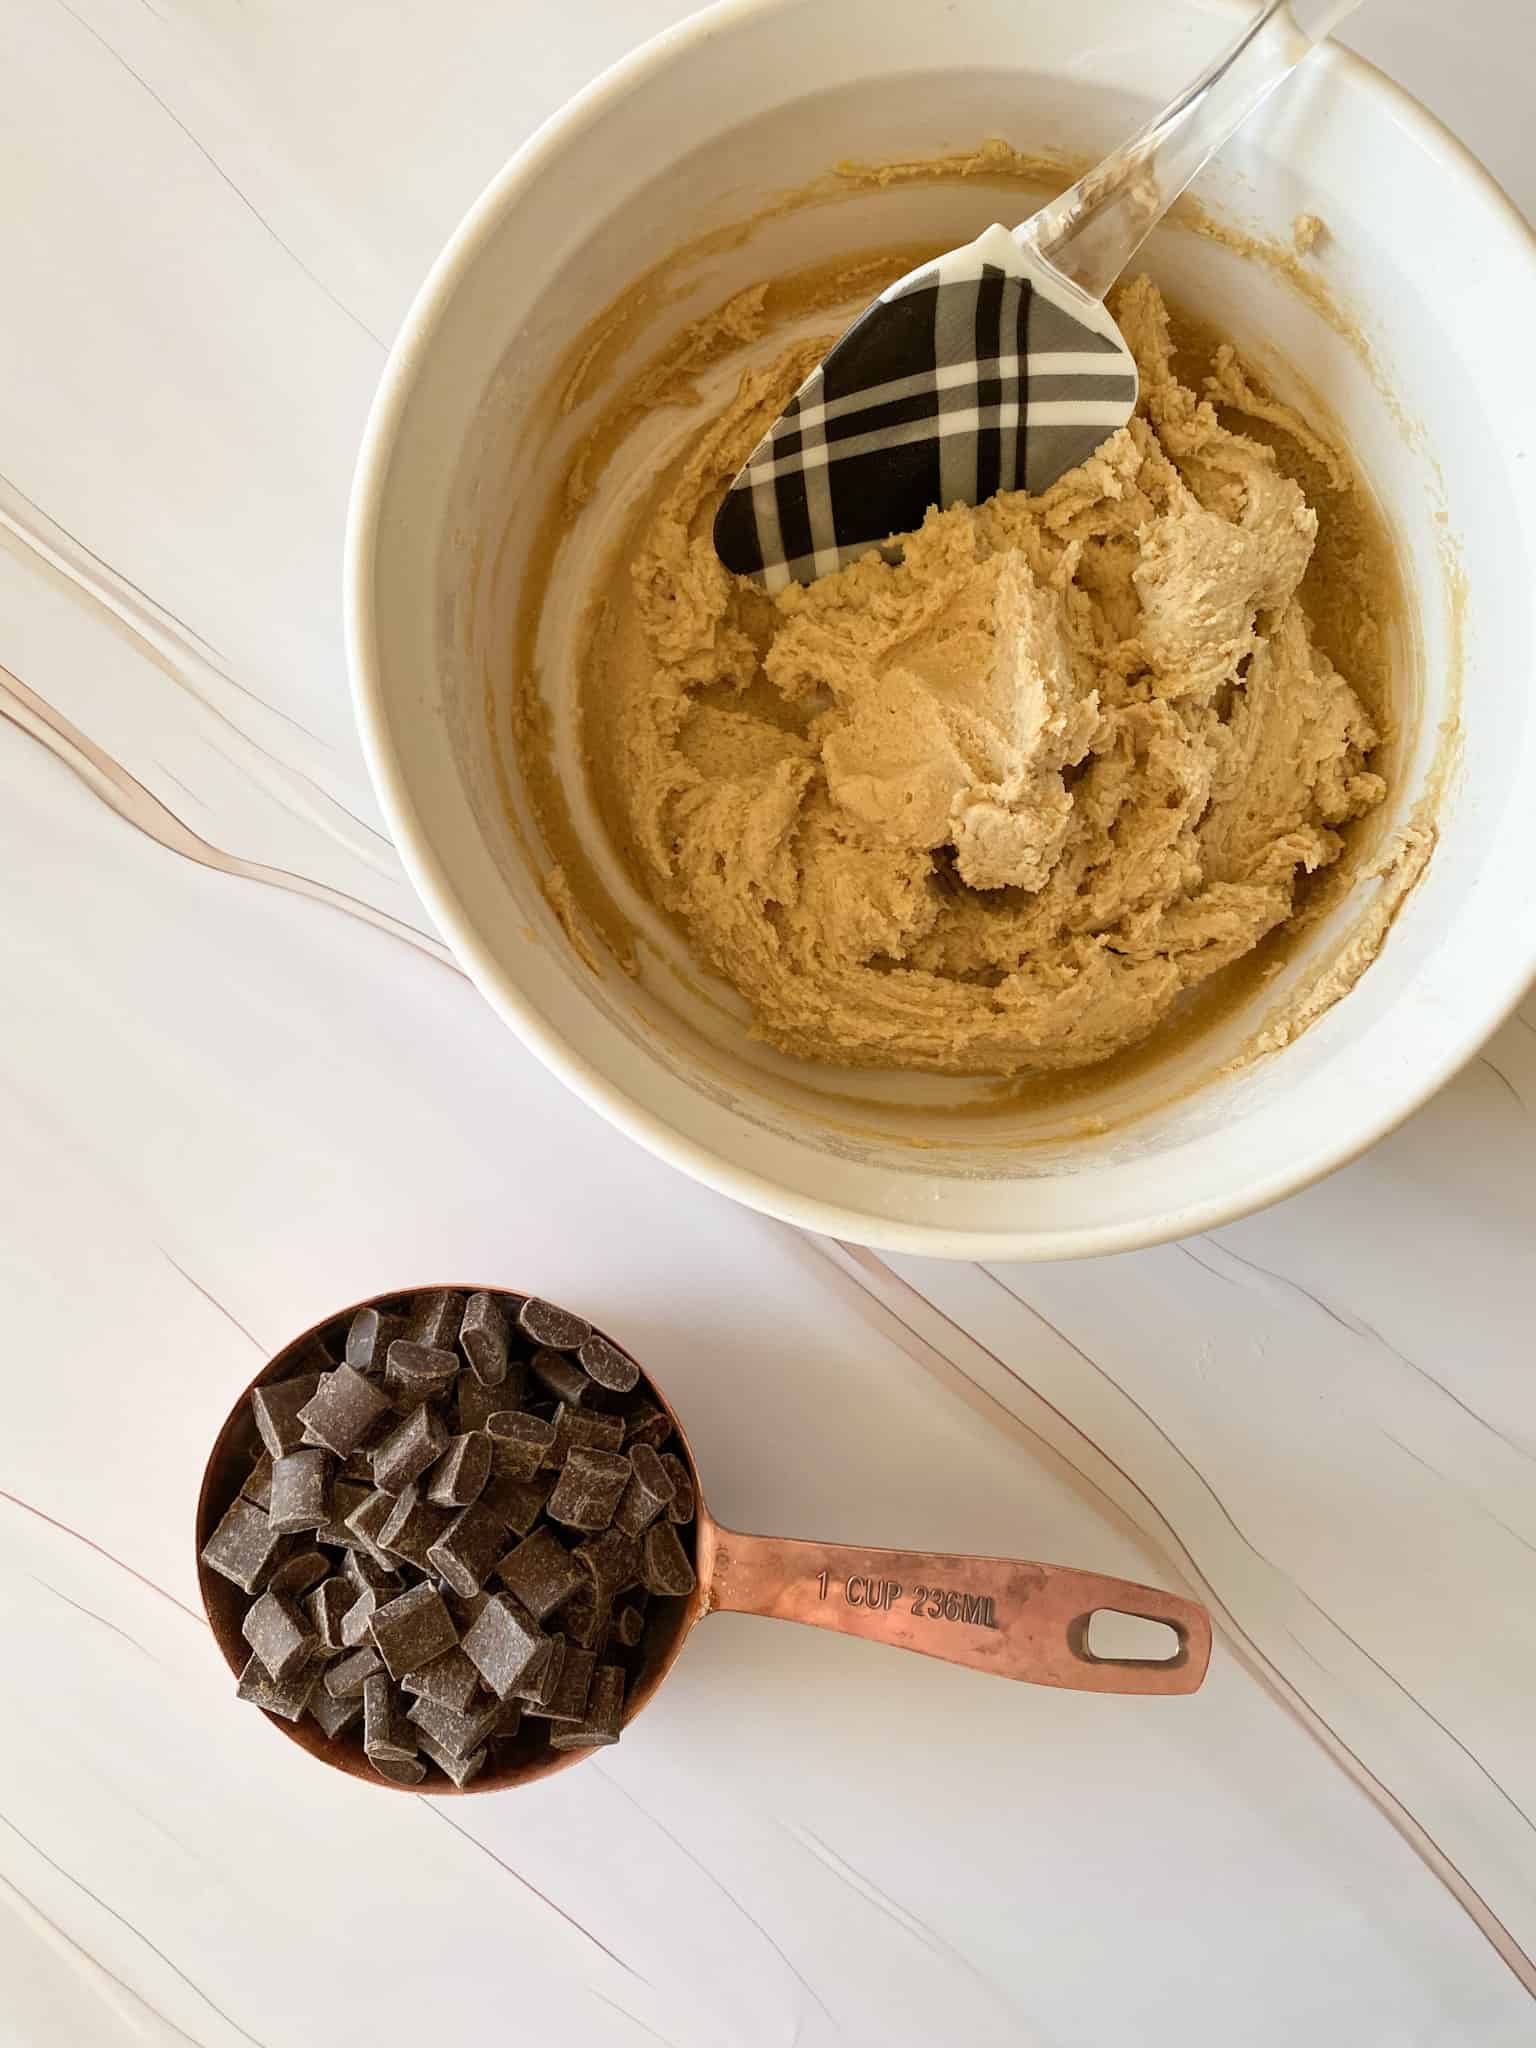
Beat again until all the ingredients are well incorporated and fluffy.
Now add your flour, baking soda, and salt. Remember, it’s all about the “heap”. Most recipes call for sifting these ingredients together but I must admit I rarely do. Hey, I’m a busy mom and if I can save 2 seconds I will.
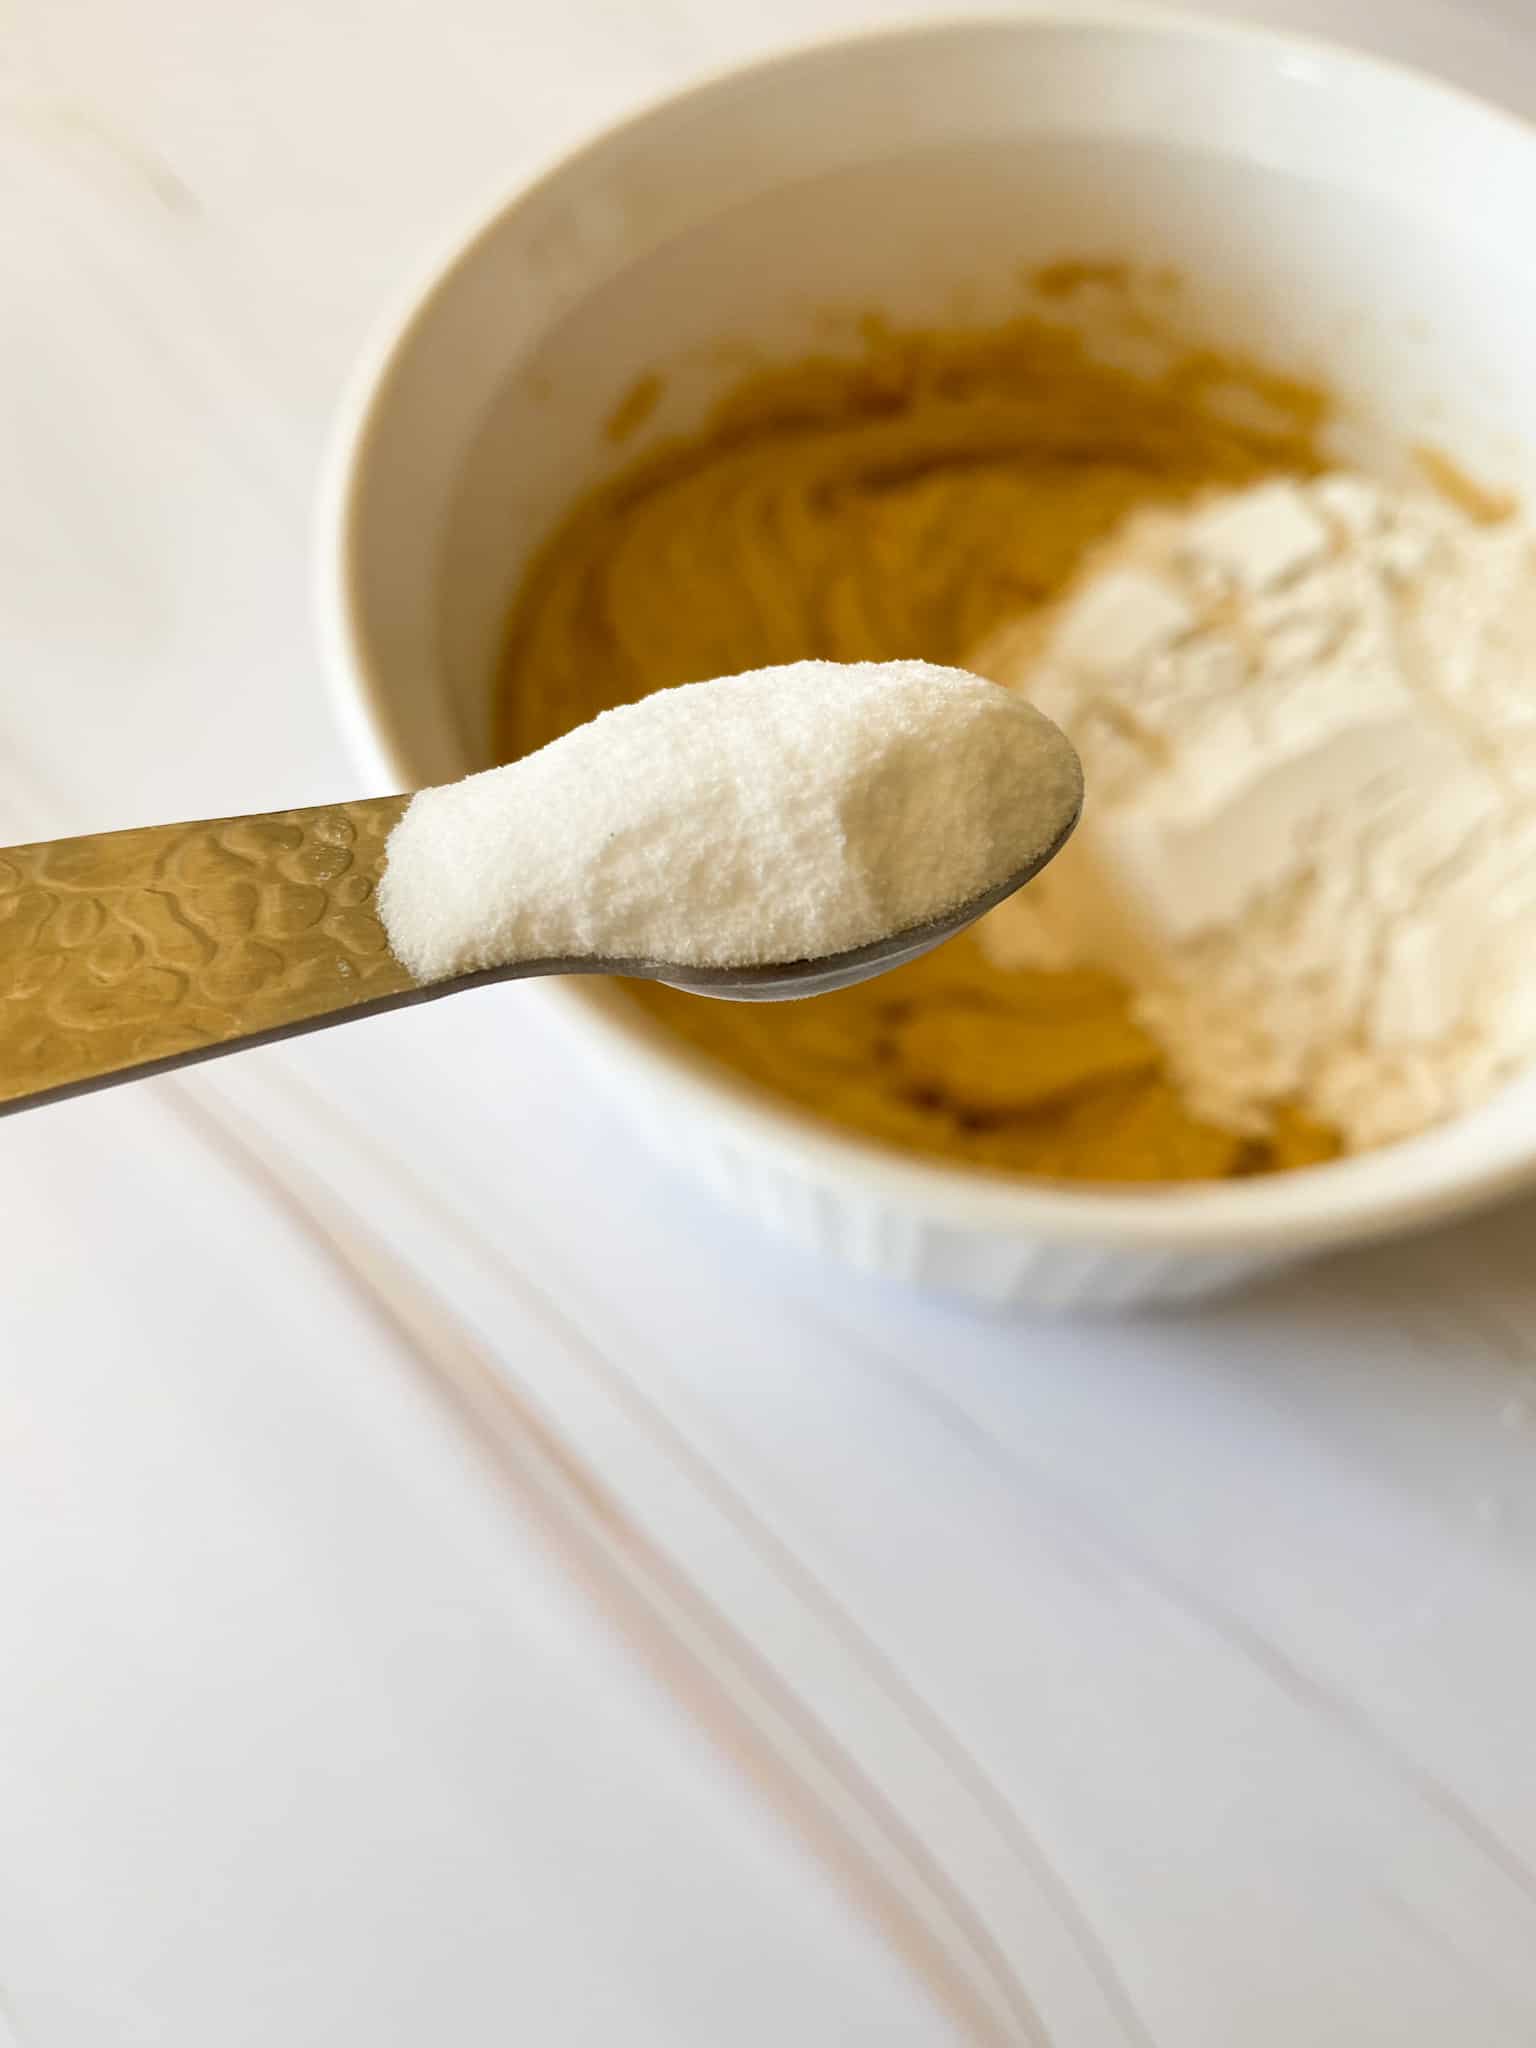
With the blender on low speed, mix until just combined. The dough should be thick and on the stiff side.
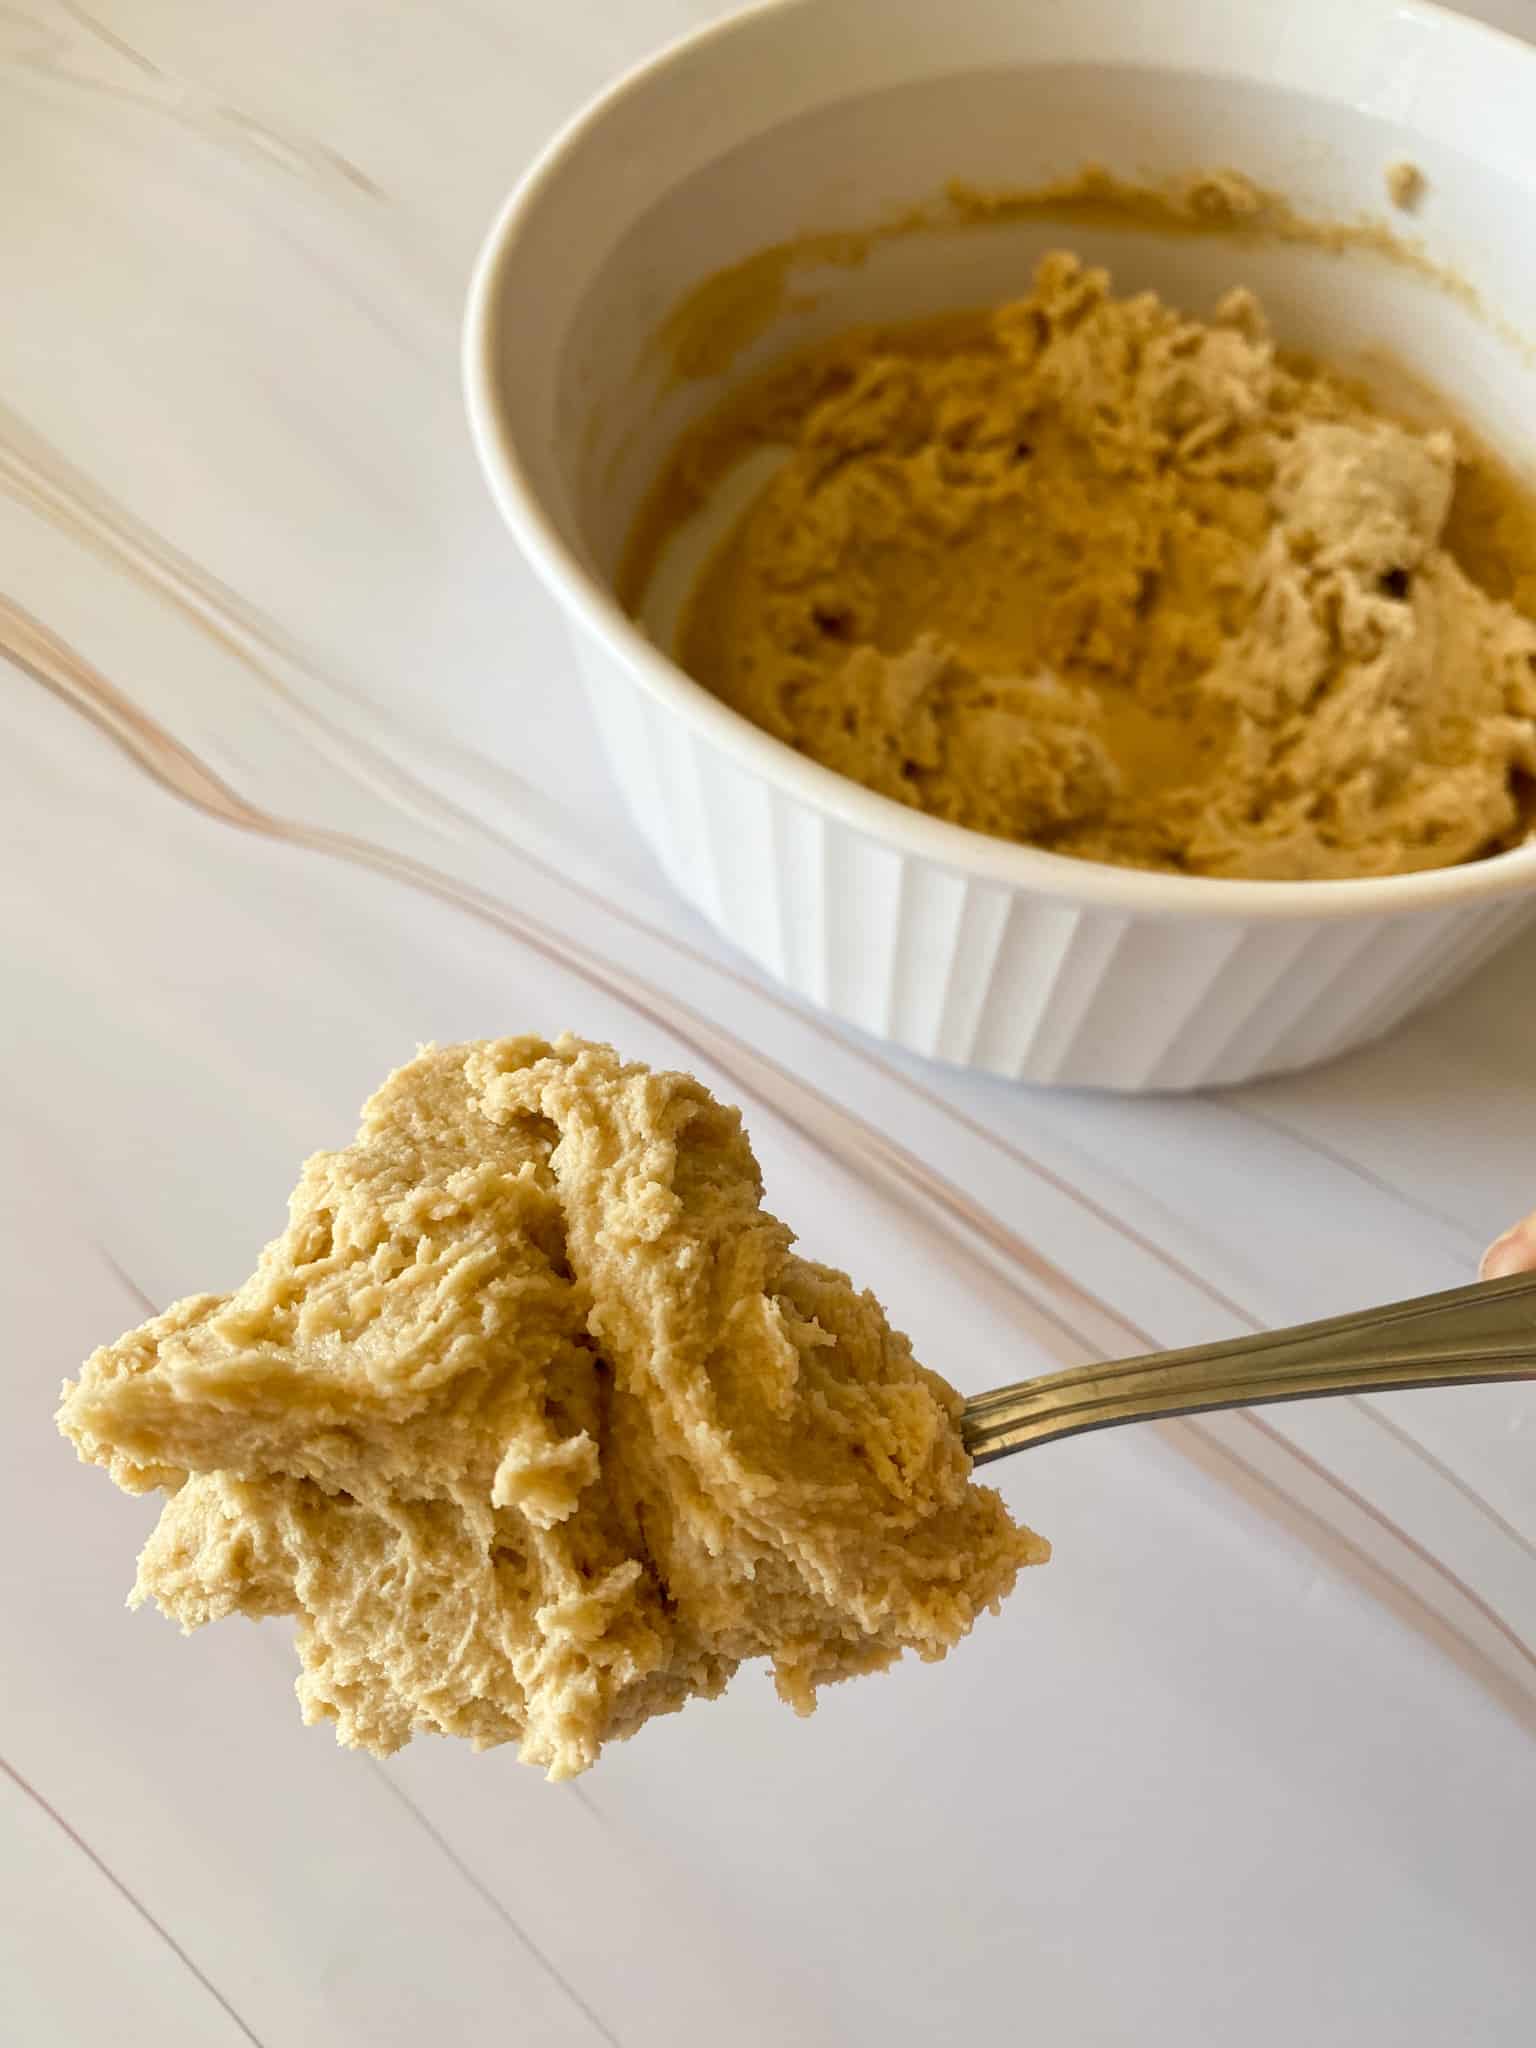
The dough should be stiff enough to pass the upside down spoon test (the dough stays in place when a spoon is inverted).
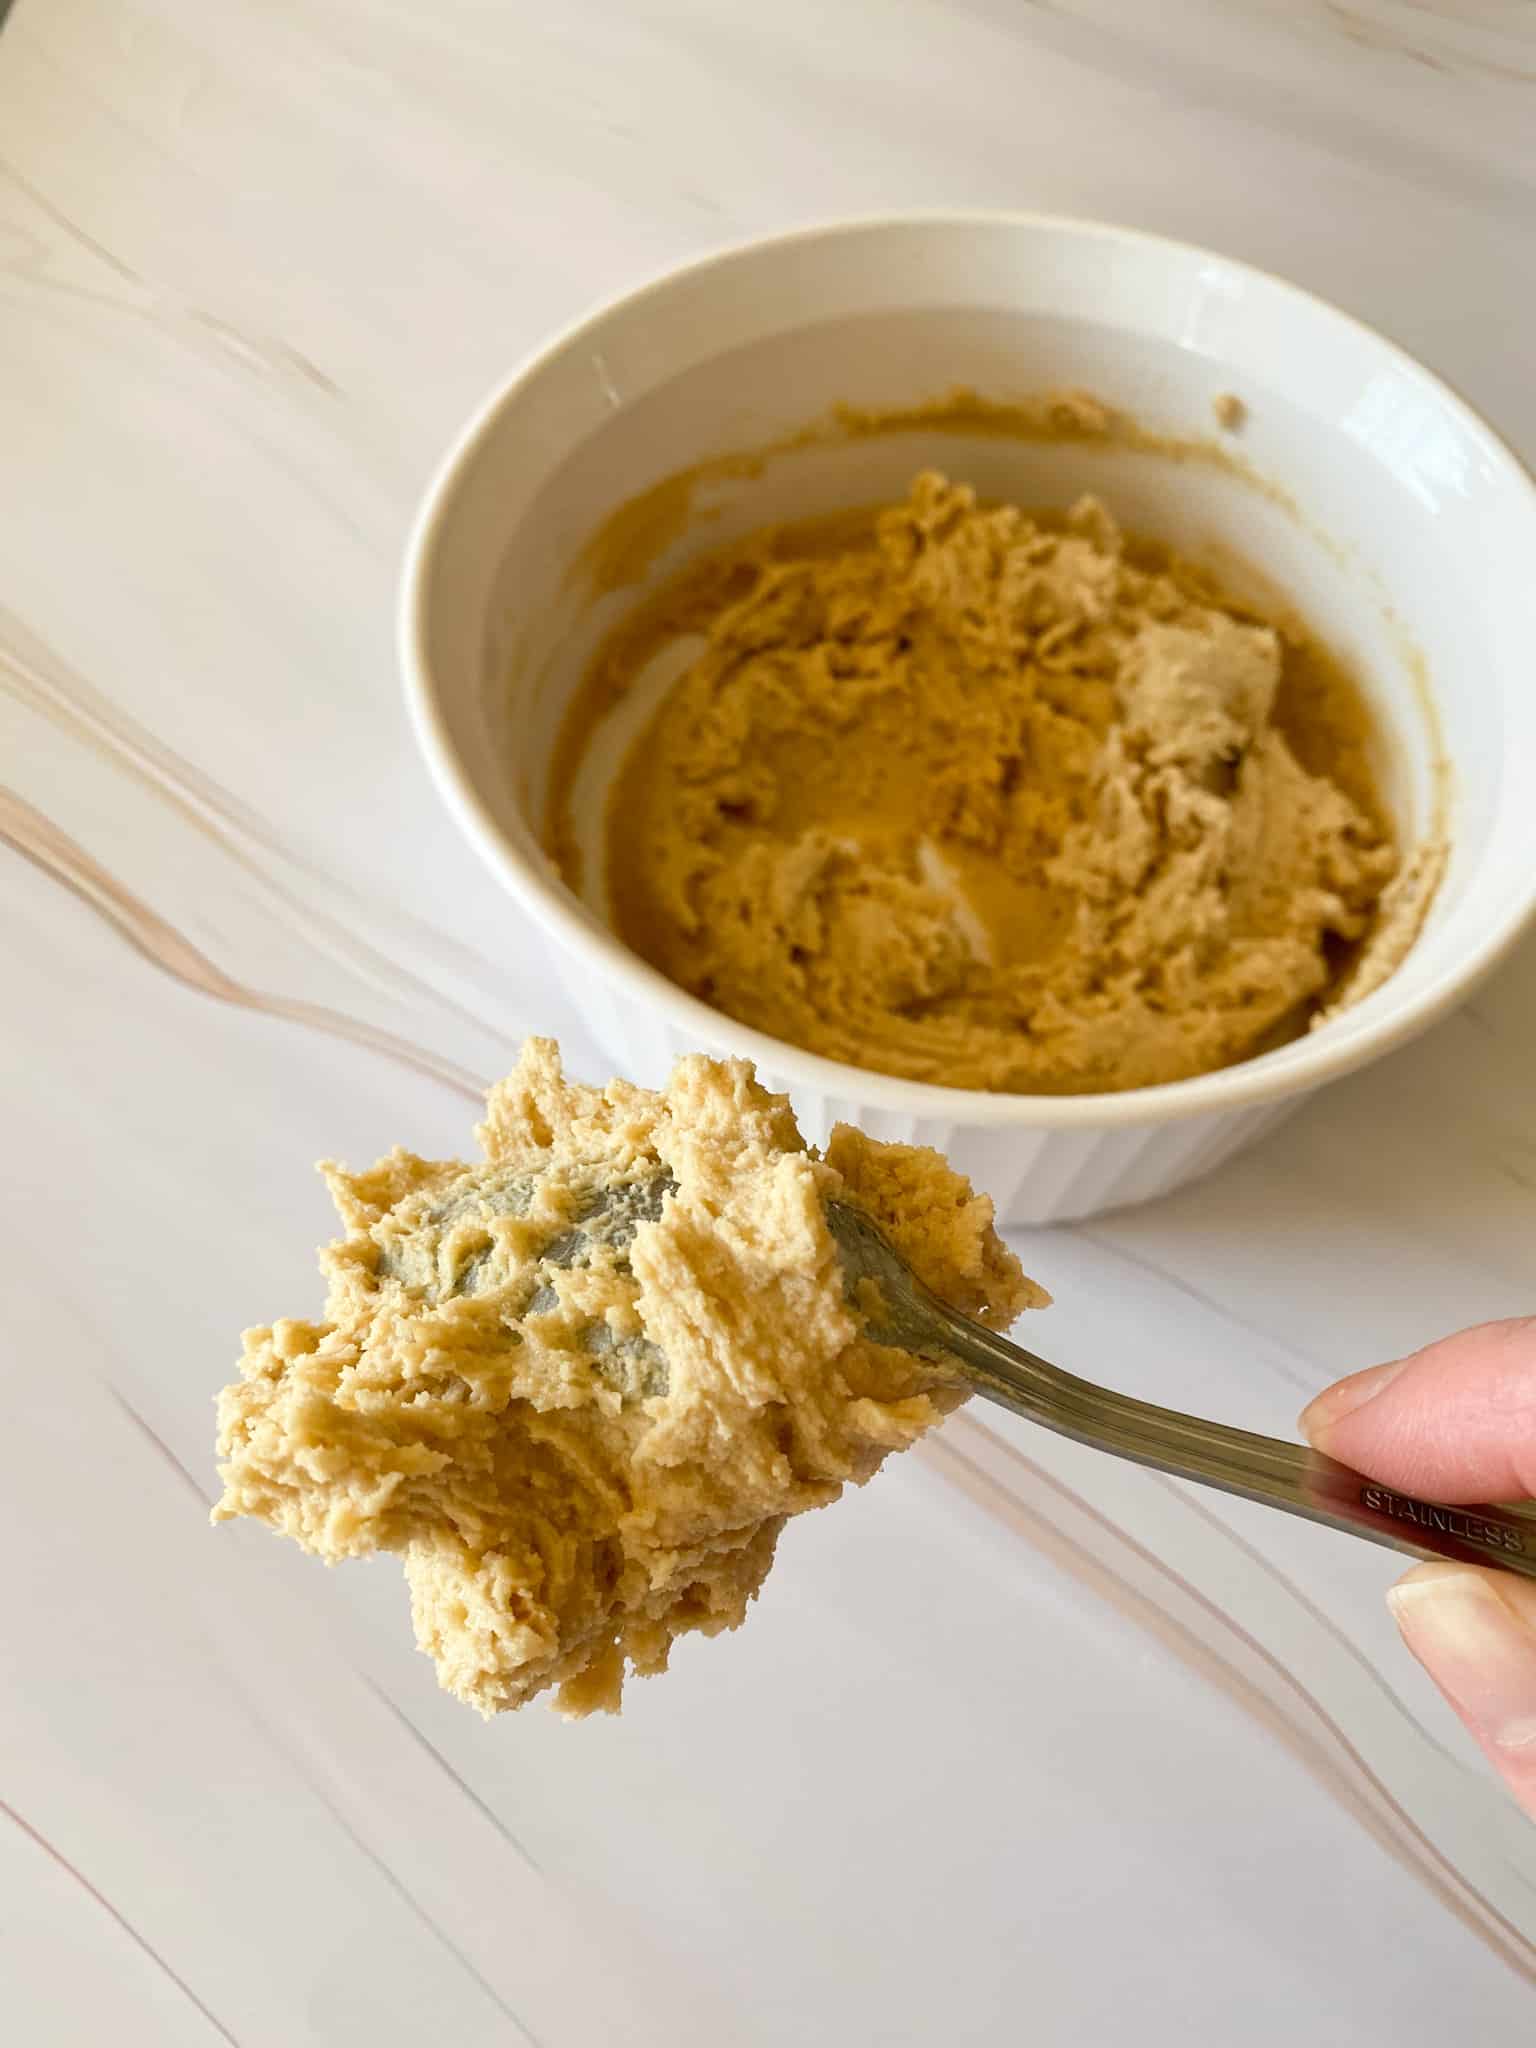
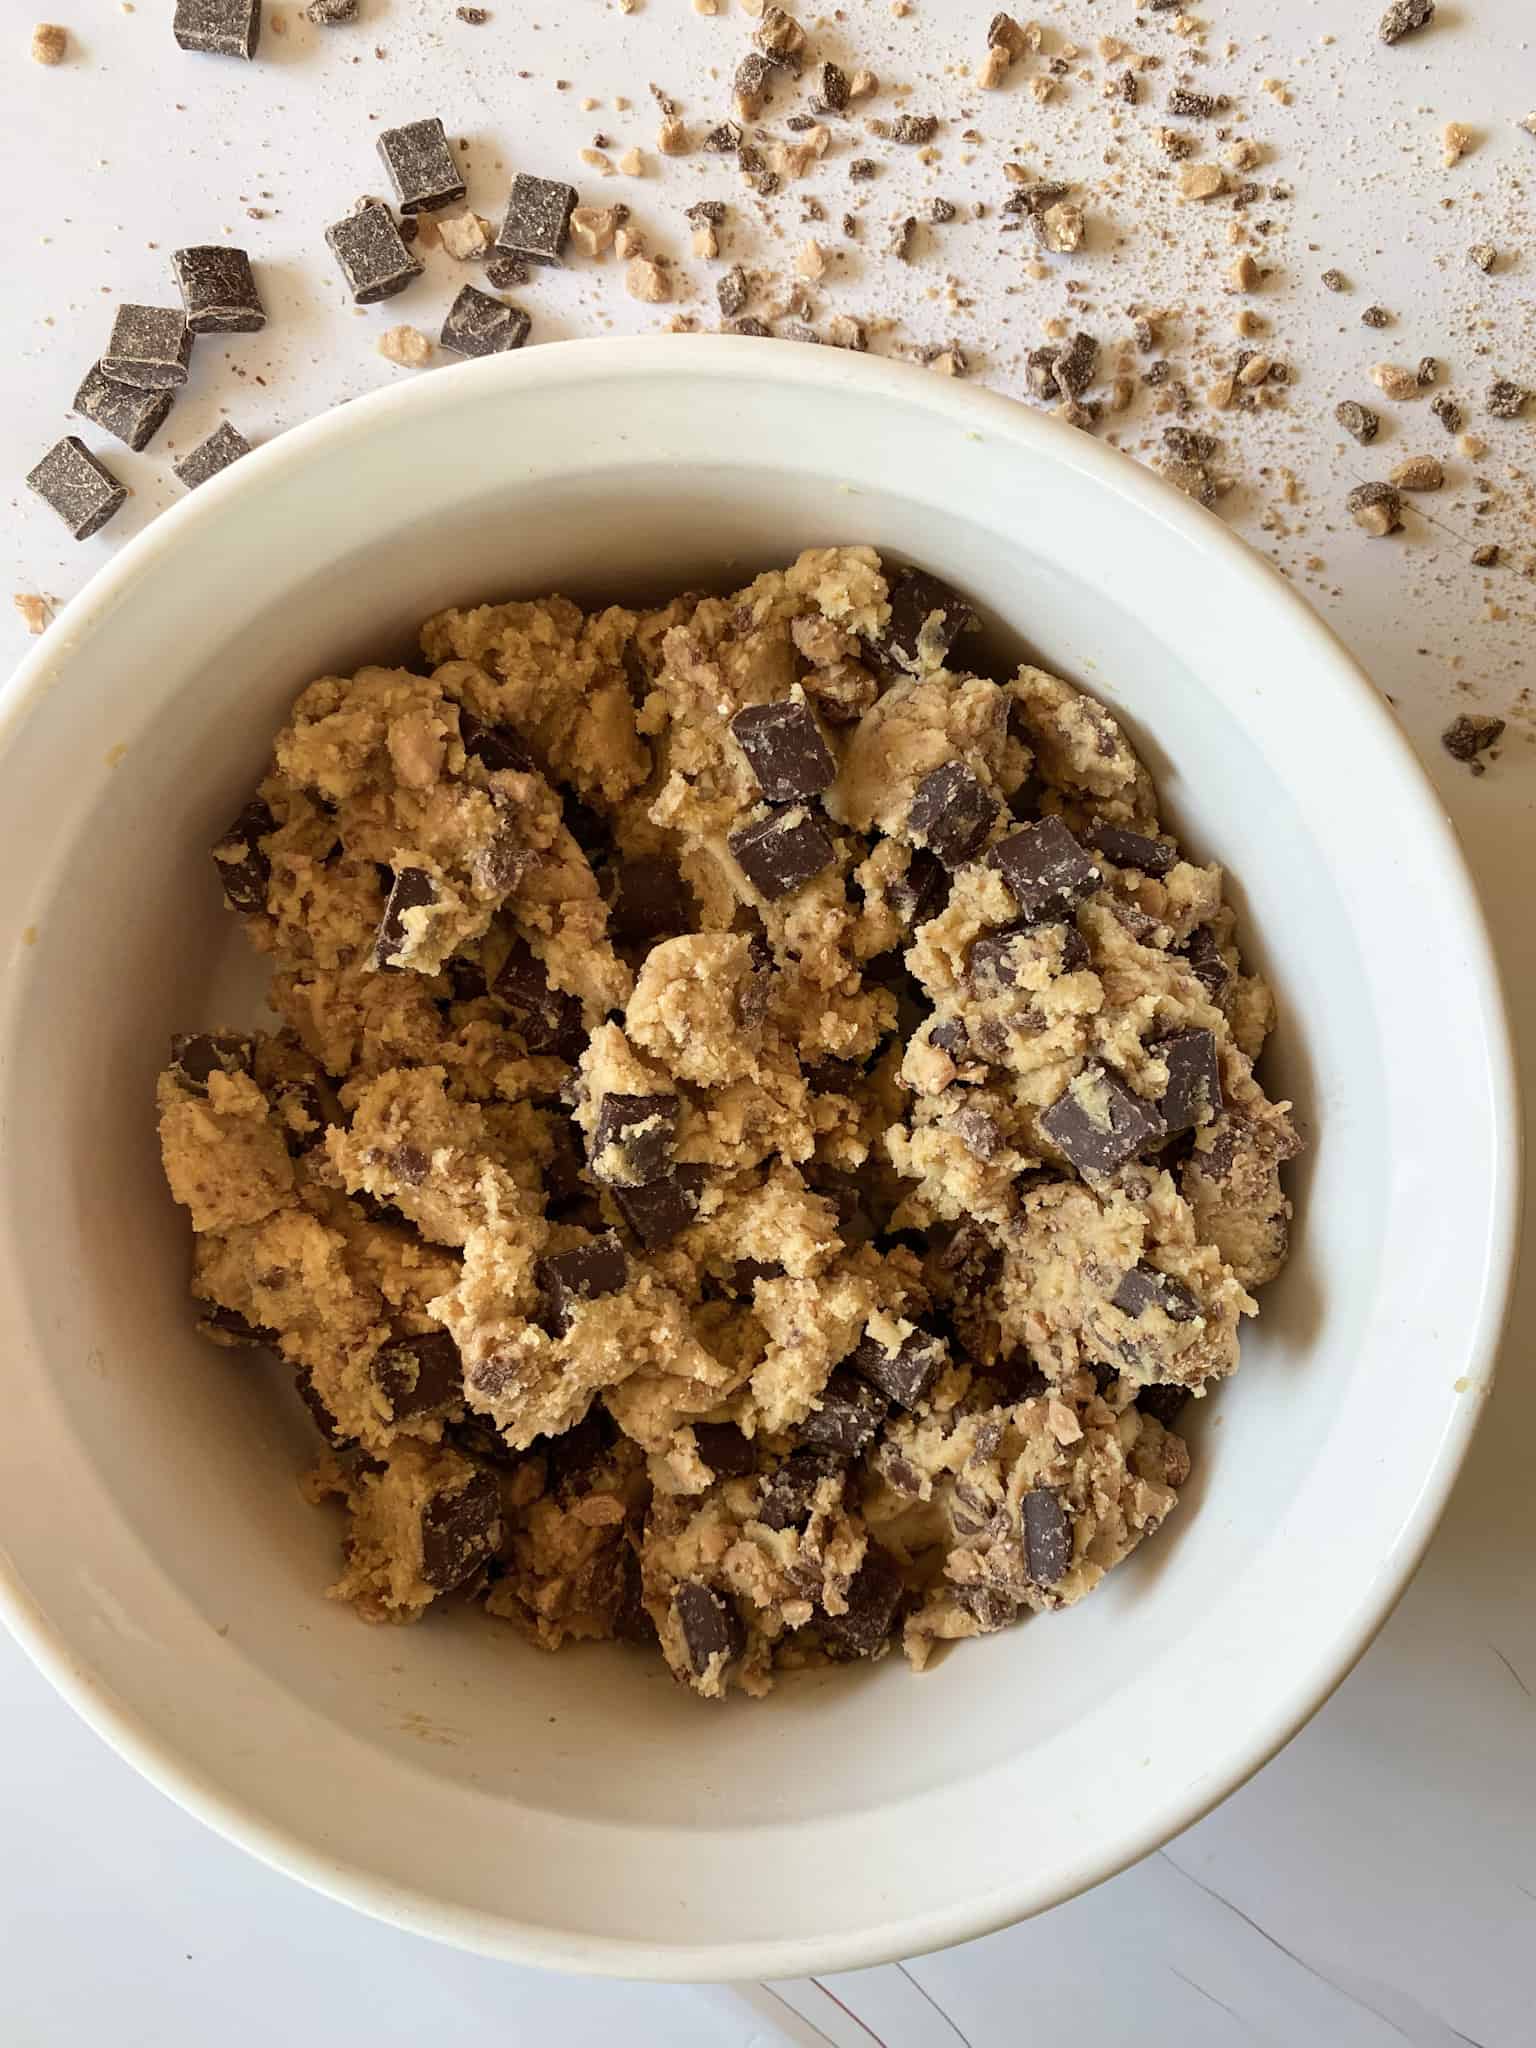
Now stir in your chocolate chips (lots of them) and toffee bits (a few of them). Adding too much toffee will alter the texture of the cookie.
Now take a spoon and plop a cookie dough ball onto your greased cookie sheet. Each dough ball should be a little over ⅛ cup. I tend to prefer darker pans but was too embarrassed to show the world my beat up “old faithful” so this particular batch was baked on something a little prettier. This recipe yields about 15 generous sized cookies. They tend to be big and spread some so make sure you don’t overcrowd. A very large cookie sheet pan can hold about 9 cookies, but I would stick to baking 6 at a time if using a standard cookie sheet (or just 1-2 cookies at a time if this is your first time making this recipe so you can figure out the best baking times).

Now bake at 375 for 8-10 minutes. You know it’s done when you see the edges are nicely browned, the top is just starting to brown, but the center still looks a little gooey.
Like this:

Take them out of the oven and let them sit on the baking sheet for at least 10 minutes to finish baking.
And then you will have this gooey chocolate chip cookie with a melted ooey gooey chocolate middle, craters galore, with a crisp yet chewy edge (sigh).
So now that you have the perfect gooey chocolate chip cookie, why not make it a little extra with this Chocolate Chip Cookie Sundae recipe. The homemade hot chocolate sauce is to die for!
Gooey Chocolate Chip Cookies
Ingredients
- 1 stick SALTED butter barely softened (I use Hiland Dairy Butter)
- ½ cup light brown sugar firmly packed
- ¼ cup sugar
- 1 large egg
- 1 teaspoon pure vanilla extract
- 1 ¼ cup all purpose flour
- ½ "heaping" teaspoon (or approximately ¾ tsp) baking soda
- ½ teaspoon salt (add ¼ teaspoon extra salt if using unsalted butter)
- 1 cup semi sweet chocolate chunks or chips
- ⅓ cup English Toffee Bits
Instructions
- Preheat the oven to 375 degrees.
- Lightly grease a large, non-stick, cookie sheet (I use a dark, airbake cookie).
- In a medium bowl, cream the butter, brown sugar, and sugar with a hand held mixer until combined well.
- Add the egg and pure vanilla extract, beat until creamy and fluffy.
- Next, add the flour, baking soda, and salt.
- Mix on low speed until just combined. The dough should be stiff.
- Stir in chocolate chips and toffee.
- Drop by rounded ⅛ cup portions onto lightly greased cookie sheet.
- Bake 8-10 minutes until the edges are lightly browned, the top is just starting to brown, and the center is still gooey and appears slightly raw.
- Take the cookie sheet out of the oven and allow the cookies to cool directly on the baking sheet to finish baking for at least 10 minutes before serving.
Leave a Reply