Love Farmhouse decor? These are just a few Farmhouse Missouri Girl Home projects to give you some diy Farmhouse furniture inspiration.
[Missouri Girl is a participant in the Amazon Services LLC Associates Program, an affiliate advertising program designed to provide a means for sites to earn advertising fees by advertising and linking to Amazon.com].
In the past few years I have learned the value in building my own diy farmhouse furniture.
Yes, it is an investment in your time but the savings are HUGE! Now I am addicted to making my own easy diy farmhouse furniture for just a fracture of what I would have paid in the store. Plus the quality is often better as I use solid pine for a majority of my pieces.
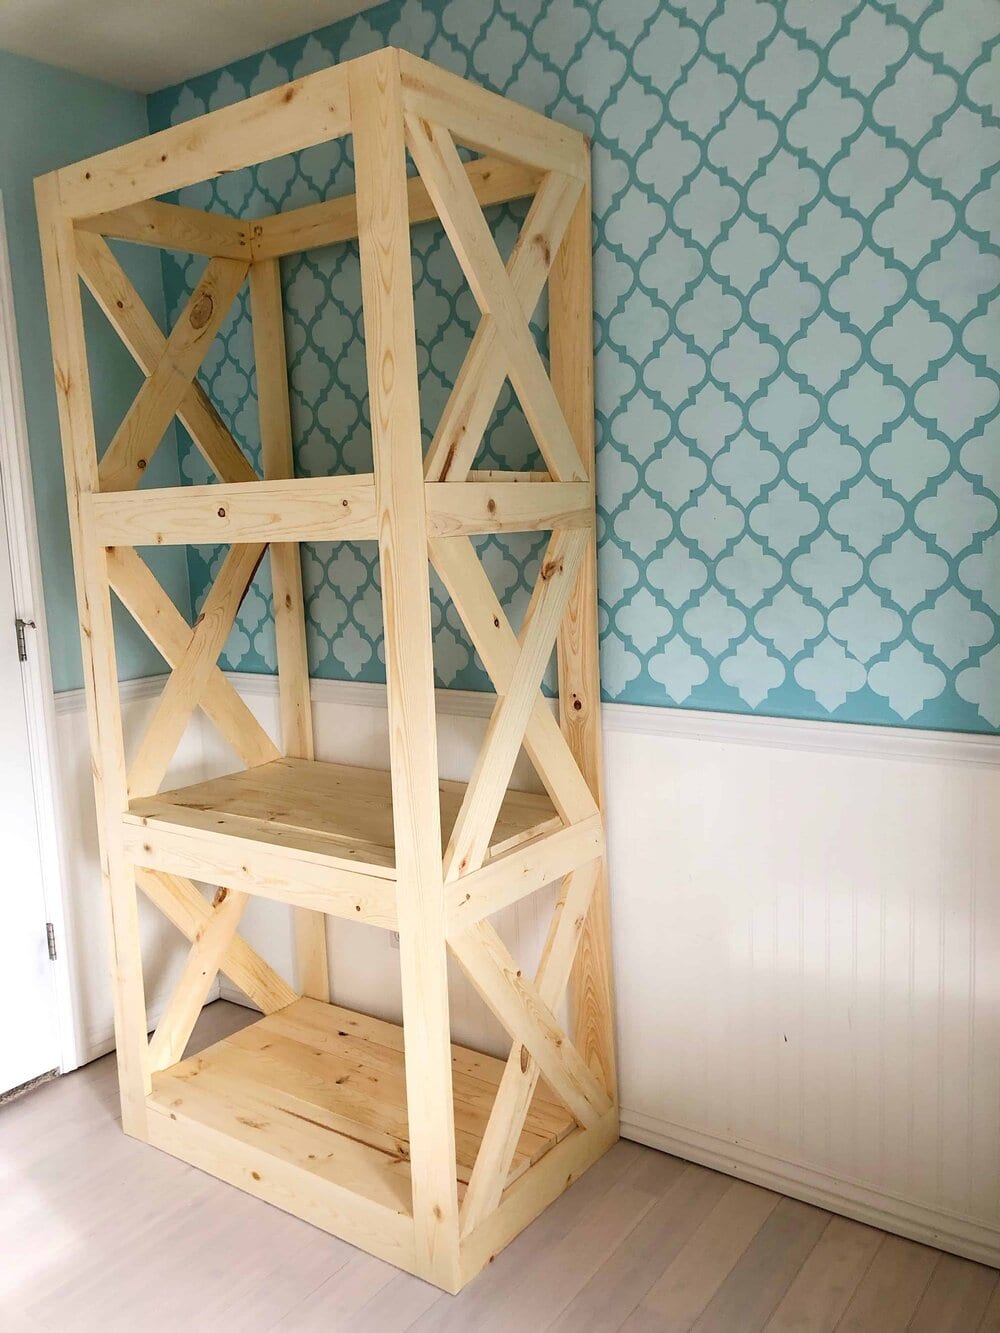
Farmhouse Shelving Unit
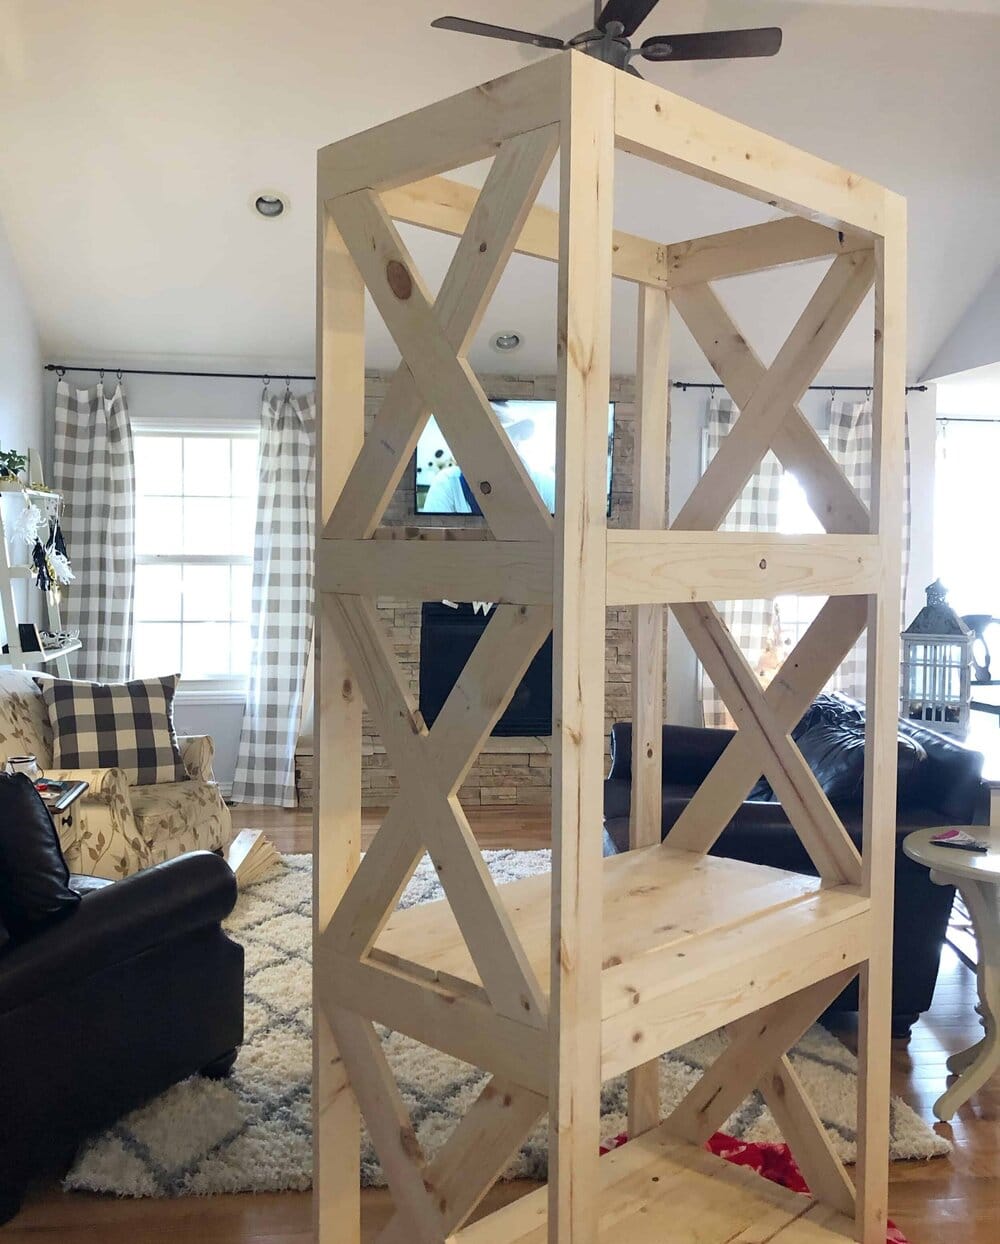
Last Christmas we welcomed a new member to the family.
Charlie the Guinea Pig.
My daughter had been asking for a guinea pig for 3 years so we finally gave in. Charlie is just the cutest thing and has been such a joy. However, Charlie came with a very large cage which created a dilemma…where do we put it?
My daughter wanted him to stay in her room which meant we needed to create a custom piece that was large enough to hold the cage and have additional storage for guinea pig food, toys, etc.
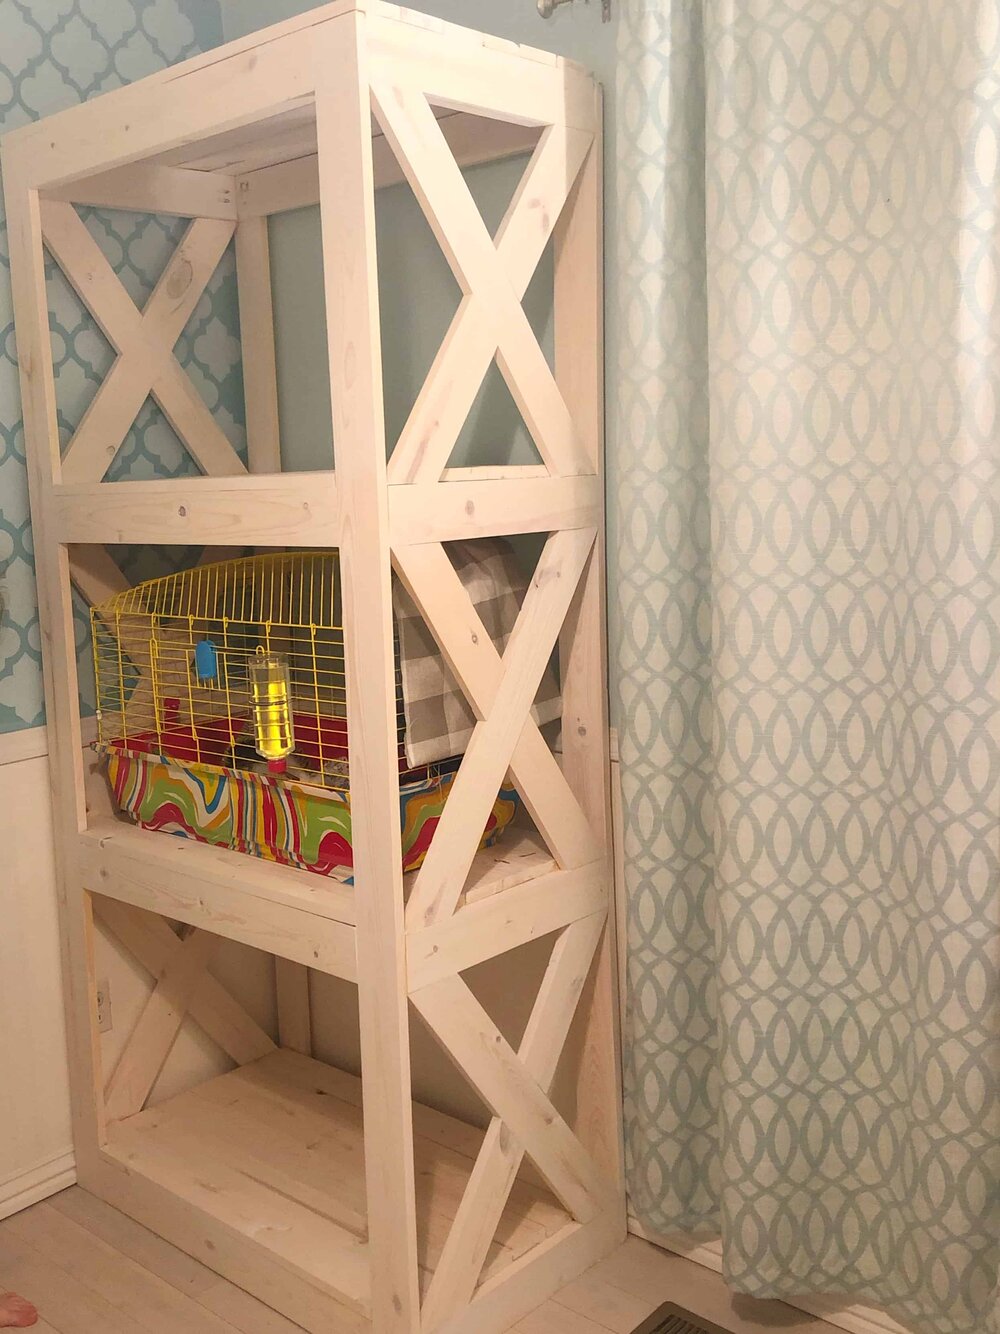
How do you whitewash bare wood for a farmhouse look?
Here is the shelving unit with a whitewash finish…plus one Guinea pig.
To make the white wash, I used a 1:1 ratio of water and white latex paint.
You can adjust this ratio however you like to get the desired look. The higher the ratio of paint, the more coverage you will have. The more water you add, the more transparent the whitewash will be.
I like for the wood grain to stand out, so for me the 1:1 ratio is perfect. If you have never used a whitewash before, it’s really quite simple.
Just remember that it needs to be used on bare wood. Here are the steps:
-
Sand your wood.
-
Remove the sand dust with a lint-free rag.
-
Prepare your whitewash (one part water to one part white paint).
-
Brush on a thin layer of wood conditioner which will help to open the wood grain for the wood to accept the whitewash.
-
Add a thin-ish layer of whitewash with a paint brush and let it sit for about 3 minutes before wiping off the excess. It helps to work in small sections on this step.
-
Let it dry completely before use. You can also put a protective finish over the white wash but I rarely do. One of the pros of using a white wash is it lends well to a distressed finish. Get a few scuffs? More character added!
DIY Farmhouse Patio Love Seat and Coffee Table
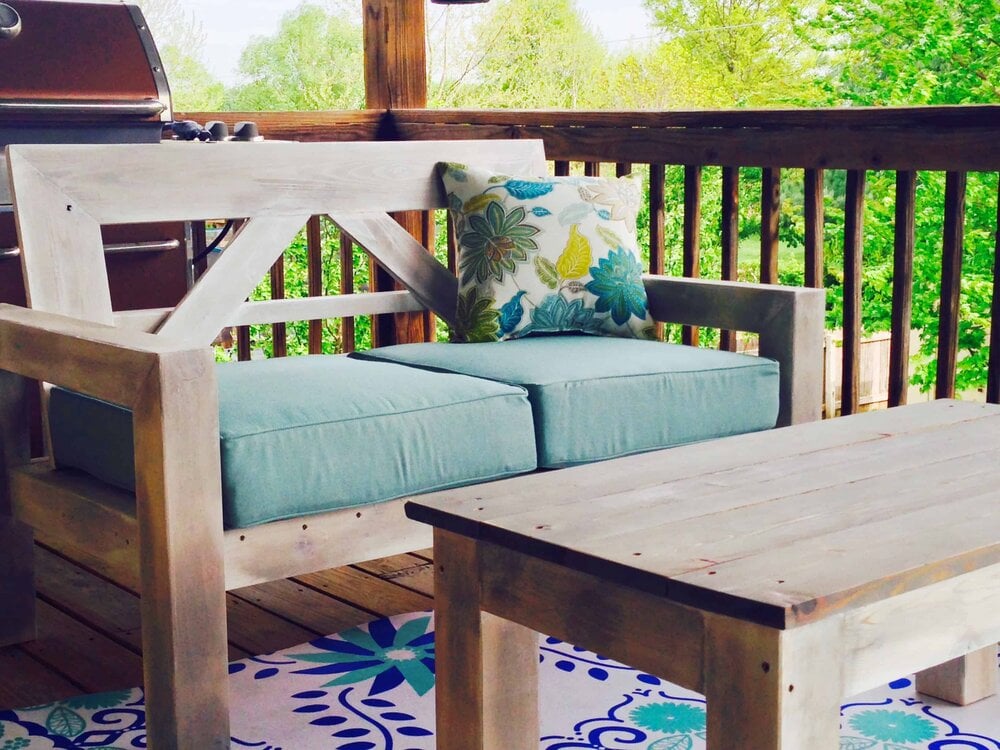
Patio furniture can be very expensive and after a year-long search, I finally gave up and decided to make my own.
For this project I used cedar lumber since it will need to hold up well in the ever changing Missouri weather.
This was long before I had discovered the Kreg Jig (my favorite woodworking tool ever) so the screws are exposed.
I just made sure the screws were placed symmetrically and they became a design element that added character to the piece.
How to get a weathered grey wood finish, the easy way.
The love seat and coffee table base got a 2 part treatment for a weathered grey look.
First, a whitewash was applied to the entire surface. Once that dried, I lightly applied the Weathered Grey stain in a random pattern (wiping off the excess as I went) to give the piece a weathered look. It was so easy and you can put as little or as much of the grey stain to suite your taste.
I just love how it turned out!
Farmhouse Baby Gate
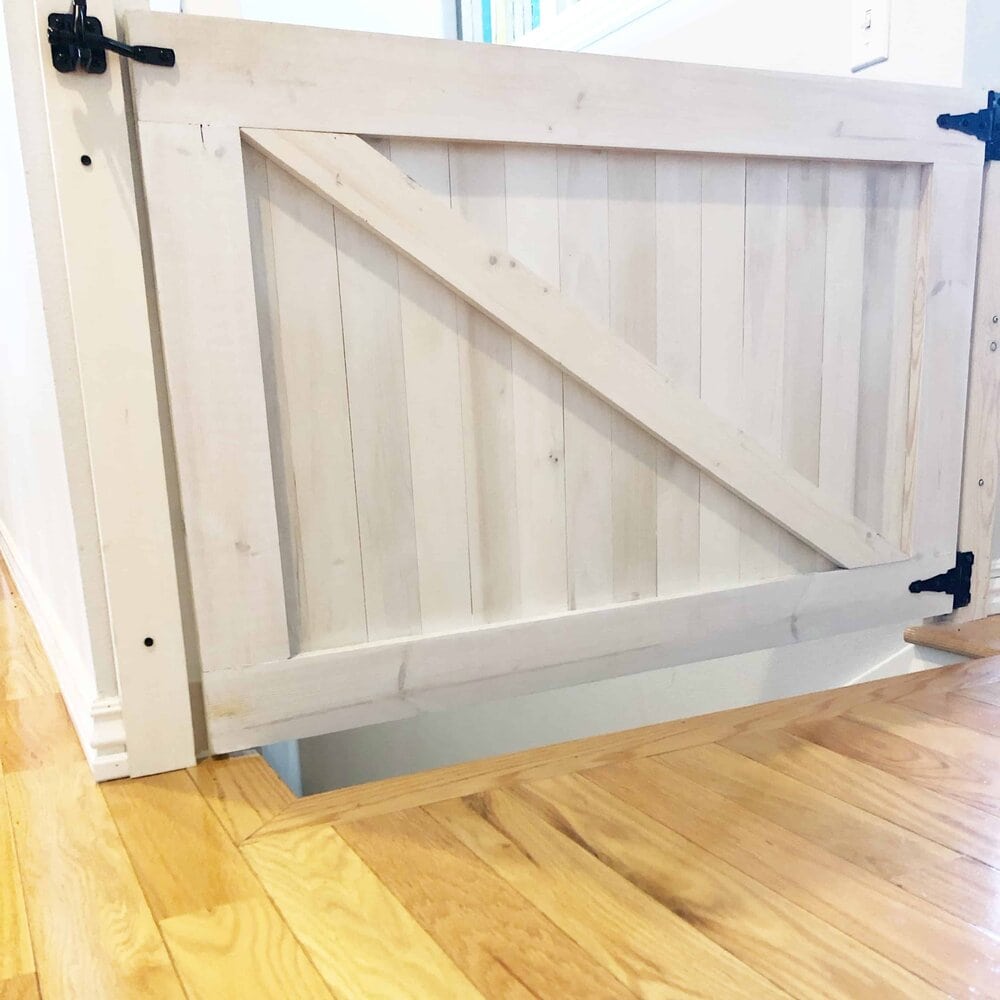
The arrival of my niece meant doing some baby proofing to our home.
If you’re going to add a baby gate, why not make it look really cute?
For this project I once again used a whitewash (are you starting to see a pattern here?) and then added cute hardware to enhance the farmhouse look.
It looks great and is functional as well.
DIY Farmhouse Bench With Java Gel Stain
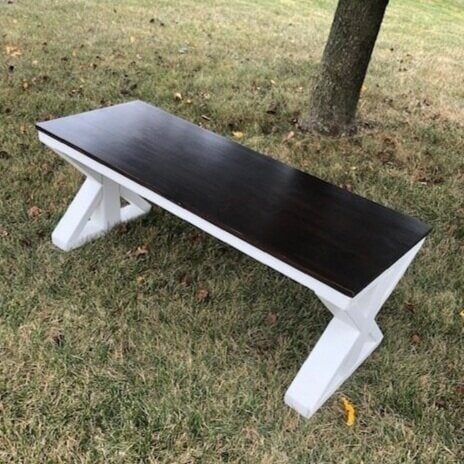
This was actually my first commissioned piece.
One of my friends mentioned she was looking for a bench for her entryway…so we talked details and before I knew it, I was building my first piece for someone other than myself.
The great thing about building custom pieces is that they can be built to fit the space versus the sometimes endless search for just the right piece. If you love Farmhouse benches then check out another easy DIY Farmhouse bench I made to house all of my plants.
She has two young boys so we knew the finish had to be durable. For the base I went with a newer product by Sherwin Williams.
Emerald.
It is an industrial urethane alkyd enamel that has many of the same properties of an oil based paint but you are able to clean up with water.
Huge advantage.
The verdict is still out on how well it will hold up but I’ll keep you posted!
For the top, I used (paid links to follow) General Finishes Gel Stain in Java with the General Finishes Gel Top Coat. I absolutely love this product! The finish is so smooth and it was incredibly easy to work with.
I hope you find some inspiration in these pieces. I love each and every one of them.
In the future, I hope to write more in depth tutorials so I can walk you through the building process step by step!
Williams says
Well done! I love these types of DIY projects. My daughter’s playroom is 9 times out of 10 the reason why I’m running to the lumberyard for more supplies.