This quick and easy laminated puff pastry uses a food processor and few short cuts to create a light, flaky, layered puff pastry in a fraction of the time.
This recipe requires only 20 minutes of active prep time, 2 roll outs, and one chilling period.
No multiple turns, folds, chill time, or a million rolls required.
The pastry is incredibly tender and airy with lots of fluffy, buttery layers.

This post is sponsored by Hiland Dairy. All opinions are my own and I only endorse tried and true products that I know and love.
Jump to:
Yes, it sounds too good to be true. But it totally works!
It took me about a year, and many failed attempts, to create and perfect this puff pastry recipe and I’m so excited to get to share it with you!
What is Puff Pastry
Classic puff pastry is a French dough that is characterized by its light, buttery, and flaky layers. It is used in both sweet and savory recipes making it a very versatile pastry. Puff pastry comes by its name naturally as it literally “puffs” up as it bakes in the oven. Classic puff pastry is incredibly fancy but has surprisingly few and very basic ingredients.
Puff pastry is pastry dough that is unique in it’s characteristic “puffy” appearance. The characteristic fluffy layers are created by the technique used to make the dough. Classic method is made by sandwiching a large block of butter between pastry dough and then performing a series of folds, turns, and rolls, followed by a chilling time. Then repeating the whole process all over again several times.
Imagine rolling out a BLOCK of butter and dough and you can imagine this is not an easy task. However, the result is paper thin layers of dough and butter which is called “laminating”. When the cold dough is placed in a hot oven, the moisture evaporates creating steam and subsequent “puff”.
However there MUST be an easier way.
What is Rough puff Pastry
Rough puff pastry is the cheater version of classic puff pastry. You get almost identical results with less time and labor. I have tried many different recipes in the past but I have always been disappointed. The results were usually very yummy but it wasn’t puff pastry. There were no sky high flaky layers going on.
There are many different methods out there for making rough puff pastry including:
- adding grated butter on a sheet of dough and then folding.
- adding dollops of butter on a sheet of dough and then folding.
- using larger chunks of butter in a regular pie dough to mimic the layers
- Missouri Girl Method: spread a thin layer of softened butter to an already buttery sheet of pastry dough and then performing ONE fold, ONE chill, and ONE additional roll out.
Sounds too good to be true, right? I’m telling you: IT’S AMAZING!!!
Quick Rough Puff Pastry Dough Method
This method took me a year to perfect.
Yes, ONE YEAR.
I wanted to create a recipe that is SUPER EASY, SUPER FAST, WITH LOADS of FLAKY, BUTTERY LAYERS. The layers were a MUST. That is what puff pastry is after all.
This recipes delivers.
I looked at many, many, MANY rough puff pastry recipes and I have yet to see this method used. It is unique for many reasons:
- requires no grating of the butter.
- uses a food processor to quickly bring the dough together.
- no HUGE blocks of butter required. Rolling these blocks out is a task.
- ONE FOLD required.
- ONE chill time required.
- only two roll outs total (one prior to chilling and one prior to baking).
The steps to make this recipe are all relatively simple so don’t be intimidated. If you have never worked with pastry before, pay close attention to the pictures as they are very detailed and will walk you through the process step by step.
It is a truly beautiful thing.
I kinda wanted to cry with joy the first time I created those coveted flakey layers.
Tips for success
Use quality butter
Hiland Dairy butter is my absolute favorite! It makes all of my baked goods just a little better.
I stock up every holiday season when it goes on sale and store the extra in the freezer so I always have some on hand.
If you can’t use Hiland Dairy then use the best butter you can find.
Work with the coldest ingredients
When making the dough, make sure all of the ingredients are as cold as possible. This means keeping your butter in the refrigerator (or freezer) until it’s needed and use ice cold water. I always fill a bowl with ice and water prior to making the dough.
Puff pastry requires laminating the dough which means butter is layered into the dough. Classic methods do this by forming a huge block of butter into a rectangle and transferring the butter block to the pastry dough to be folded and rolled…many times…and with a bit of elbow grease.
I discovered that I could roll the dough out into a thin sheet, spread a thin layer of barely softened butter all over the top of the dough sheet, do a few folds, and then chill the dough. This solidifies the butter in between the layers of dough so that it can form those flaky buttery layers during the bake.
Make sure the dough is cold prior to baking
This might sound repetitive but it is SO IMPORTANT! You have to work fast. If the dough is not very cold when it goes into the oven then the butter will not be in a solid state and the steam will not be released properly. This means you won’t get the right amount of lift between the dough layers and sadly no light, flaky, HEAVENLY, puff pastry.
All equipment and surfaces should be cool to prevent the butter from melting within the pastry.
I think by now you understand the importance of cold everything. This includes all equipment and working surfaces. No doing this in a south facing window full of sun. I have even been known to put ice on my working surface prior to rolling the dough out.
Hello, hot and humid Missouri summers.
Avoid overworking the pastry dough
Handling the dough too much can cause it to become tough and you may loose that airy tenderness we all crave when eating puff pastry.
Keep the weather in mind
Pastry can be a bit temperamental in certain conditions, especially really hot and humid weather. It may require occasional periods of rest during the process to place the dough in the refrigerator for a few minutes to chill before proceeding.
Dough consistency
This dough will start out on the wet and sticky side. With each step we add in a little more flour until we get to the correct consistency.
Ingredients
The ingredients are very simple:
- flour
- butter
- salt
- water
That’s it! It’s amazing that such simple ingredients can come to together to create such an amazing and sophisticated pastry.
Cost
You can make homemade puff pastry for about half the cost of the store bought version. The butter is the biggest cost of this recipe, but it is important to use quality ingredients. Whenever I see my favorite butter go on sale around the holidays I buy up a ton of it.
The sale price when broken down for each stick of butter was $0.63. This recipe calls for total of 3 sticks of butter so the grand total for butter is $1.88. The rest of the ingredients have very little cost when broken down so the grand total to make this pastry is about $2.20. That is about ⅓ the cost of store bought puff pastry.
Puff pastry recipe ideas
Do you love pastry desserts? Try one of my favorite Holiday Cookies: Brown Sugar and Cinnamon Rugelach.
Dessert puff pastry recipe ideas
- danishes
- puff pastry twists
- Missouri Girl Home Homemade Apple Strudel Braid
- puff pastry sticky buns
- chocolate pastries
- tarts
- fruit and cream pastry stacks
- sweet palmiers
- sweet pinwheels
- napoleans
- churros
- tarte tartin
- Profiteroles
Savory puff pastry recipe ideas
- baked brie
- empanadas
- savory pinwheels
- cheese straws
- canapes
- savory palmiers
- gourmet pizza
- breakfast pockets
The steps
Make the puff pastry dough in a food processor
Using a food processor streamlines this process and is a huge time safer. I now make all of my pastry dough using this method.
It is so simple.
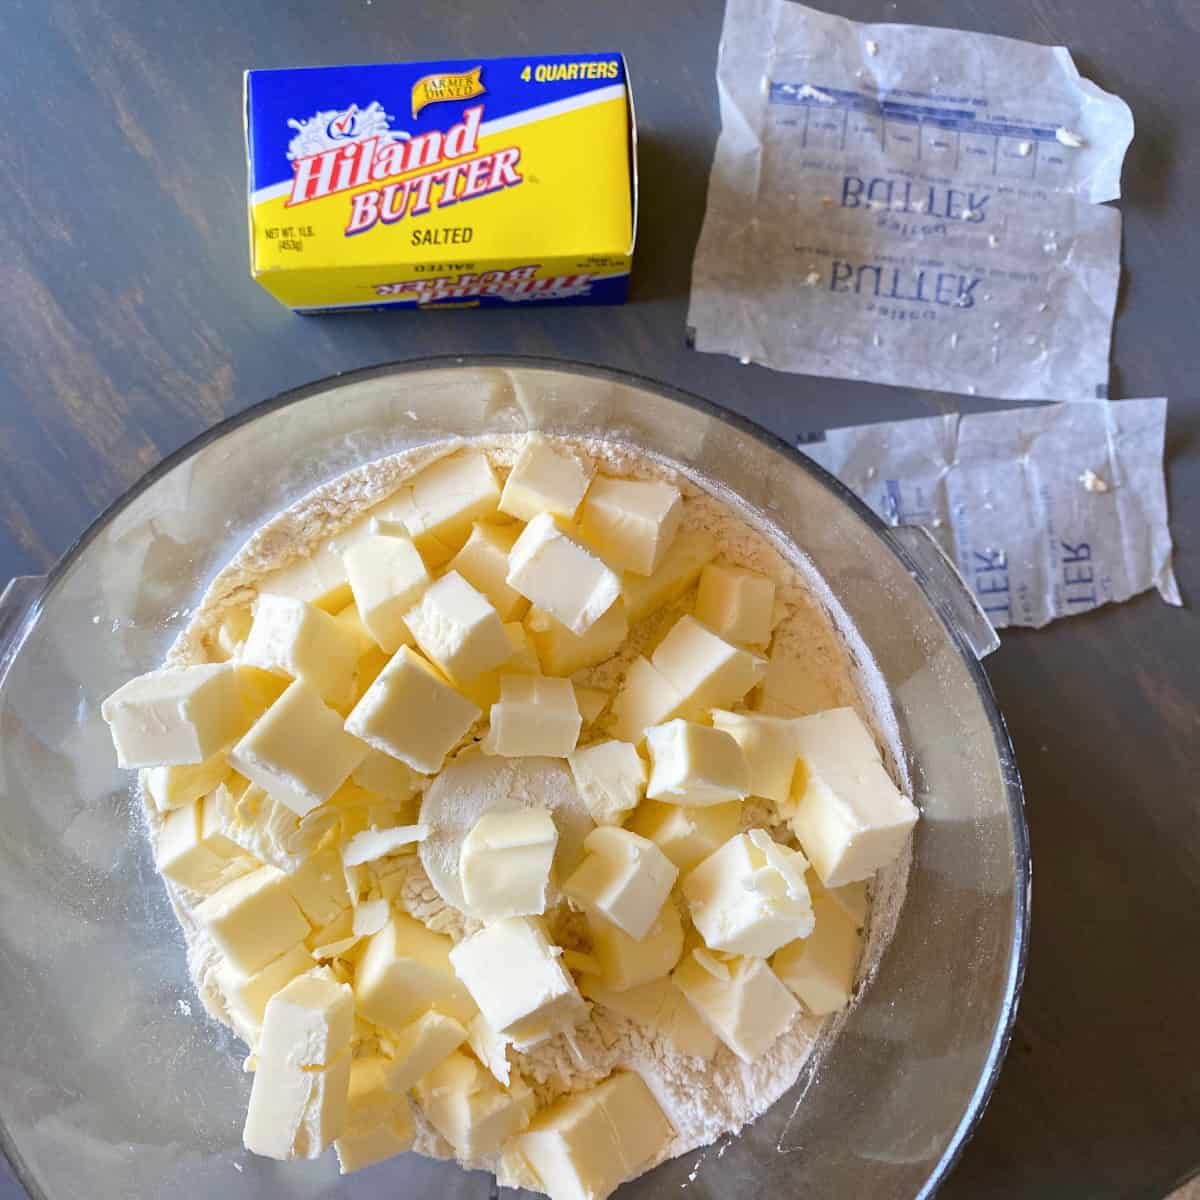
Begin by adding the flour and salt to a large food processor. Then add the VERY cold, cubed butter. Pulse 20 times in quick, short bursts.
Yes, 20 is the perfect number to create a mixture with big chunks of butter.
Bring the dough together into a ball in the food processor
Turn the food processor ON to the dough setting and add the COLD water through the feed tube in a slow and steady stream.

Allow the food processor to continue running until all of the dough comes together on one side of the food processor.

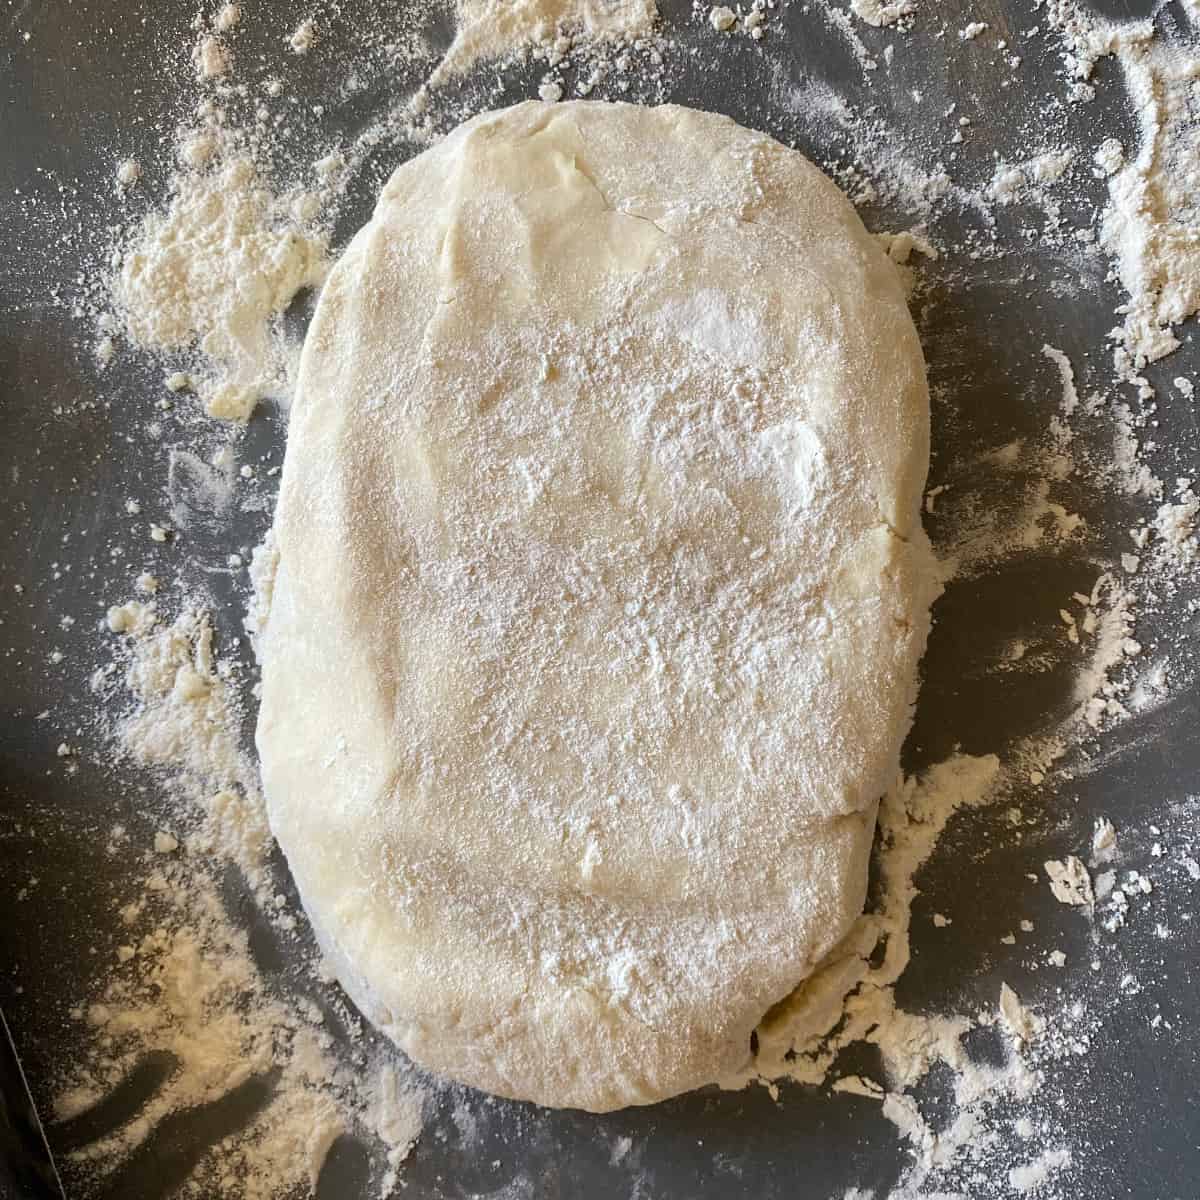
Turn the dough out onto a floured surface and form into an oval
Turn the dough out onto a floured surface, knead the dough a few times, incorporating a bit of the flour into the dough and forming a smooth ball. Add a little bit more flour to the surface if needed, form the dough into an oval and then sprinkle the top with flour.
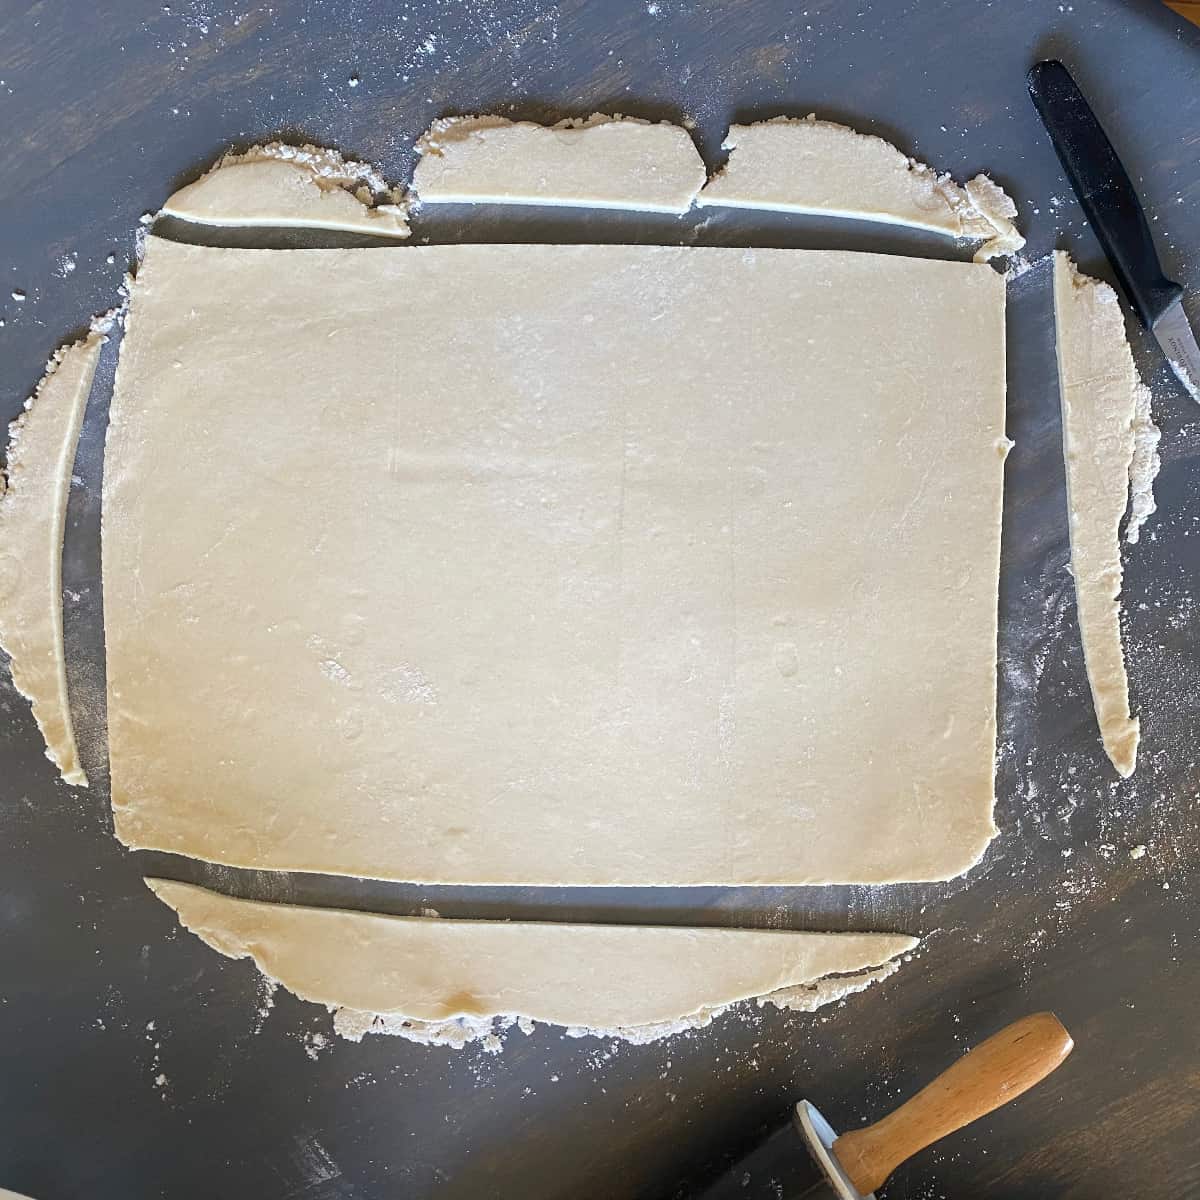
First roll out
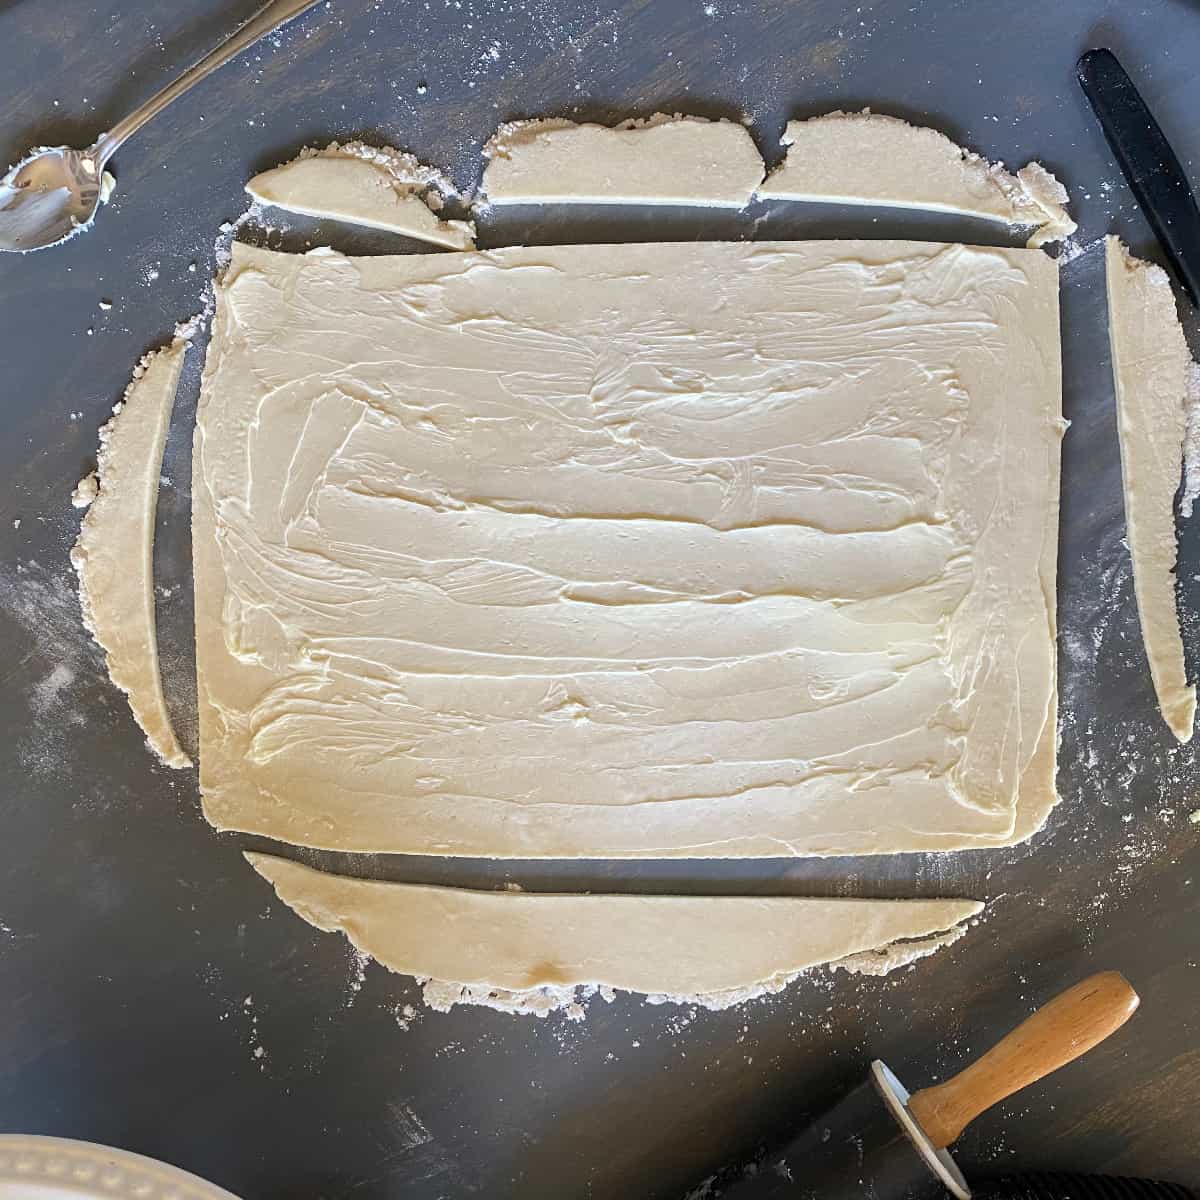
Roll out the puff pastry dough to a thickness of ¼ inch and then trim the edges to form a rectangle. You may want to keep the dough scraps for decorative pieces or to re-roll for additional pastry.
Spread softened butter over the top of the puff pastry dough.
Spread softened butter all over the top of the pastry dough, all the way to the edges. This butter layer is what will make those beautiful, flaky layers when the dough bakes.
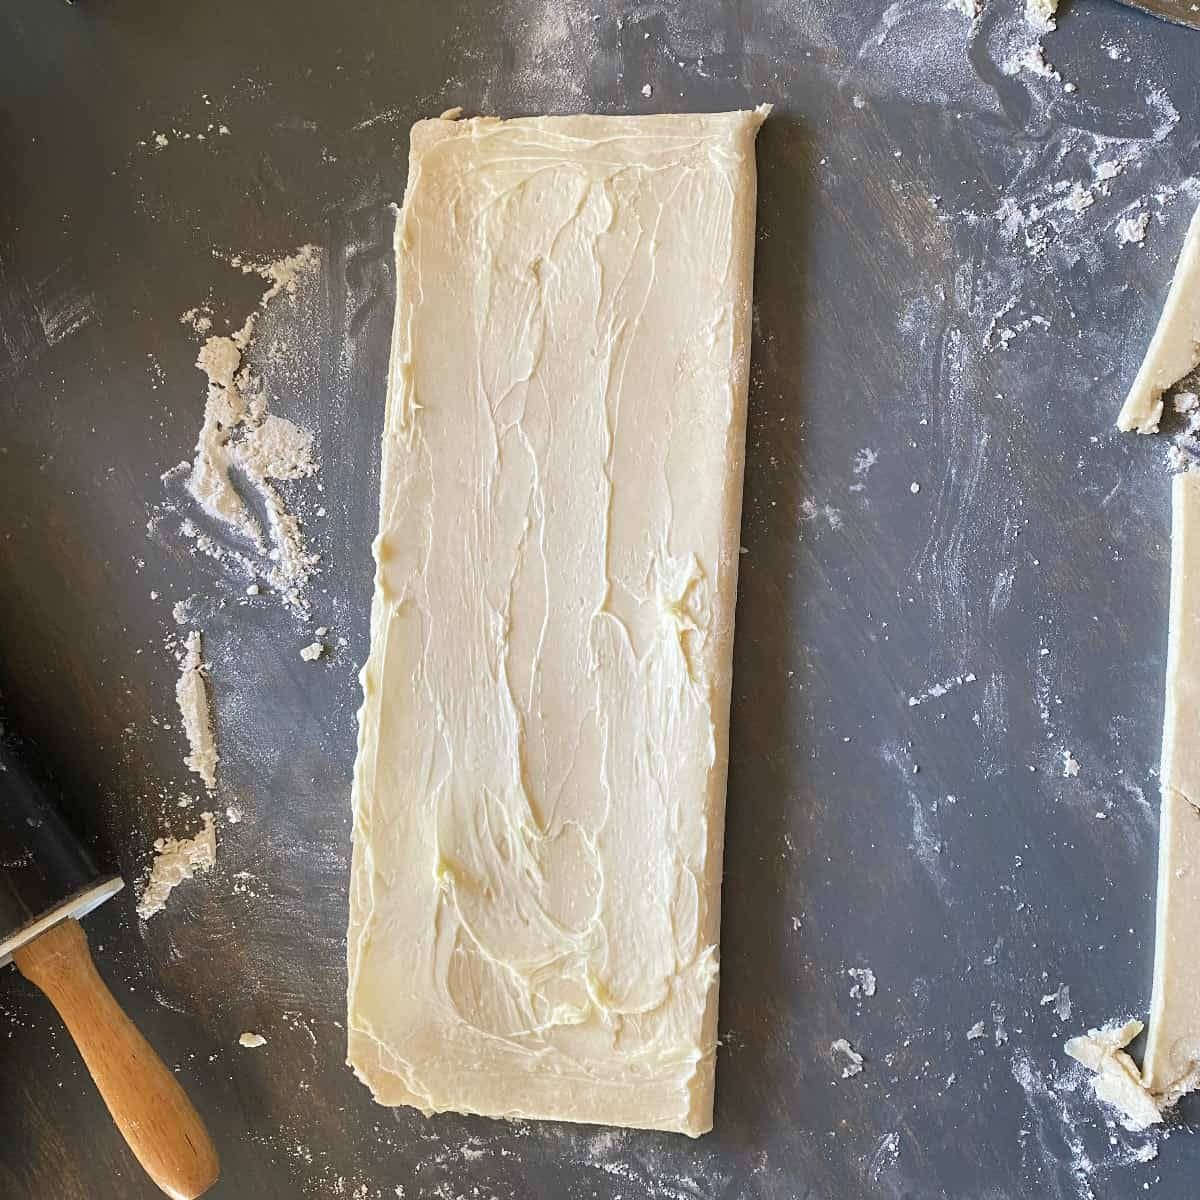
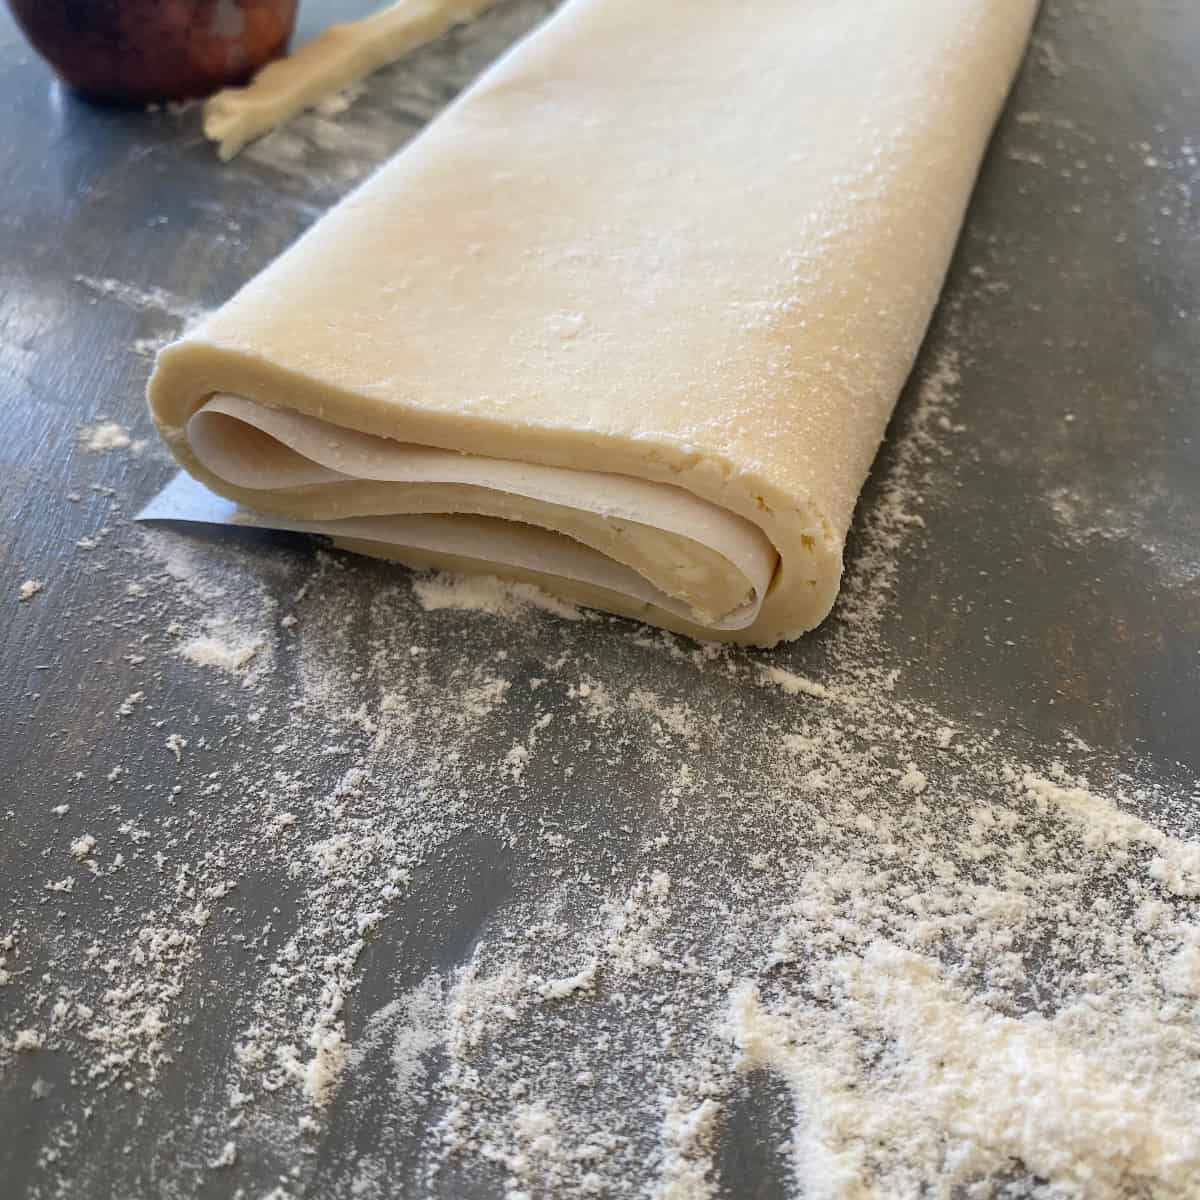
1st fold [the half fold]
Fold the pastry dough in half length wise and then spread an additional 2 tablespoon of softened butter over the top.
2nd Fold [Letter Style]
Now fold the the dough into thirds, like you would a letter.
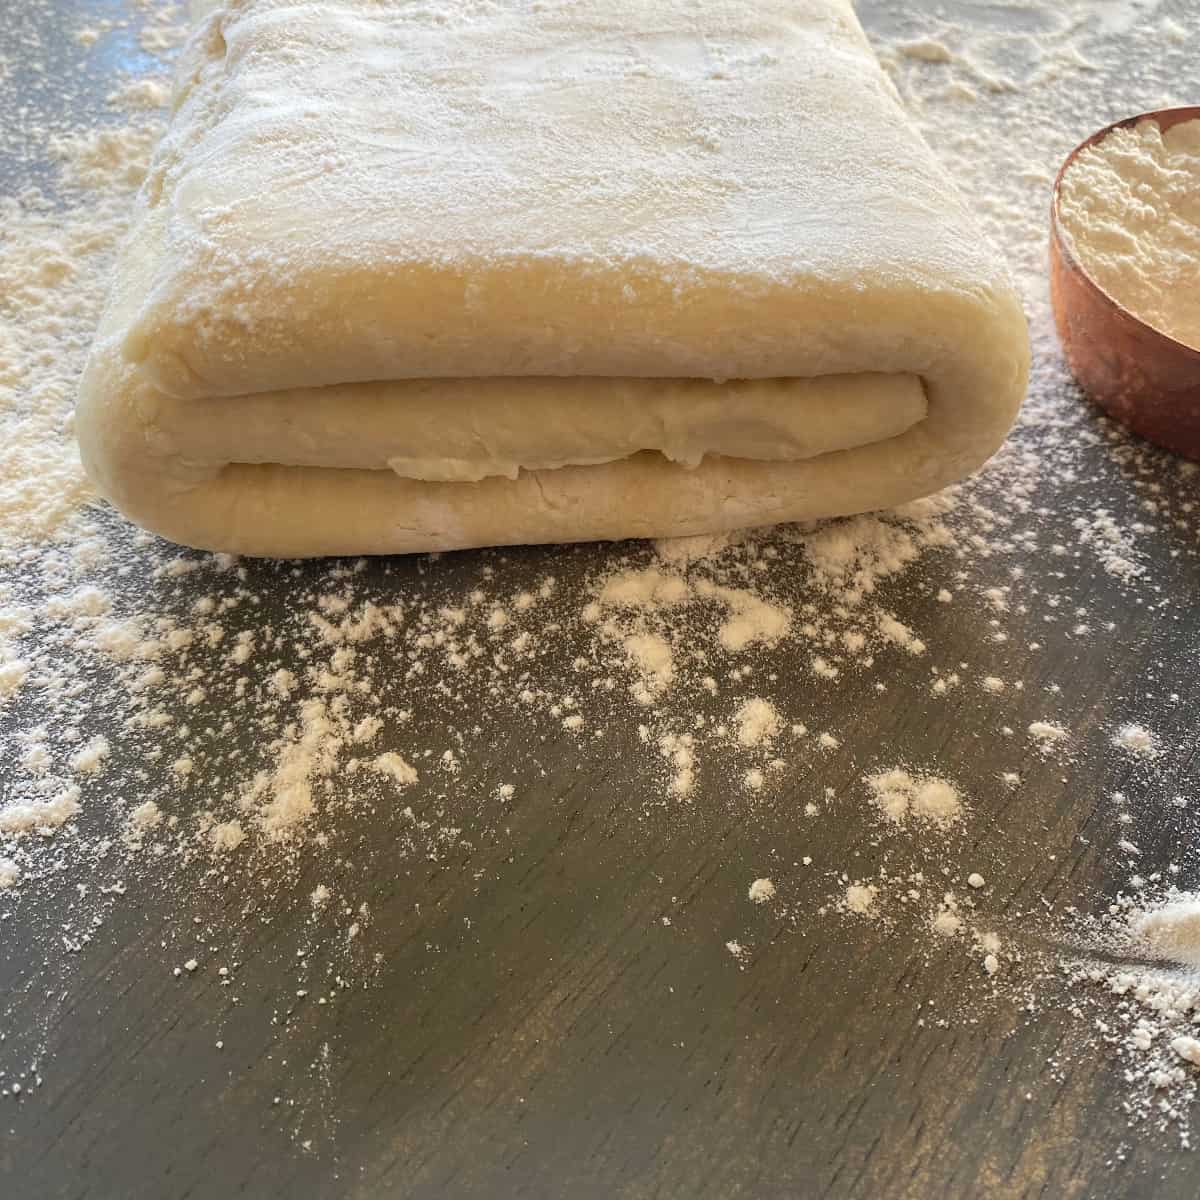
Chill
Wrap the folded pastry dough in plastic wrap and then place in the refrigerator for 1.5 hours or until thoroughly chilled. You can also keep in the refrigerator for much longer at this point and use later. I have stored this dough in the refrigerator for 3 days before using.
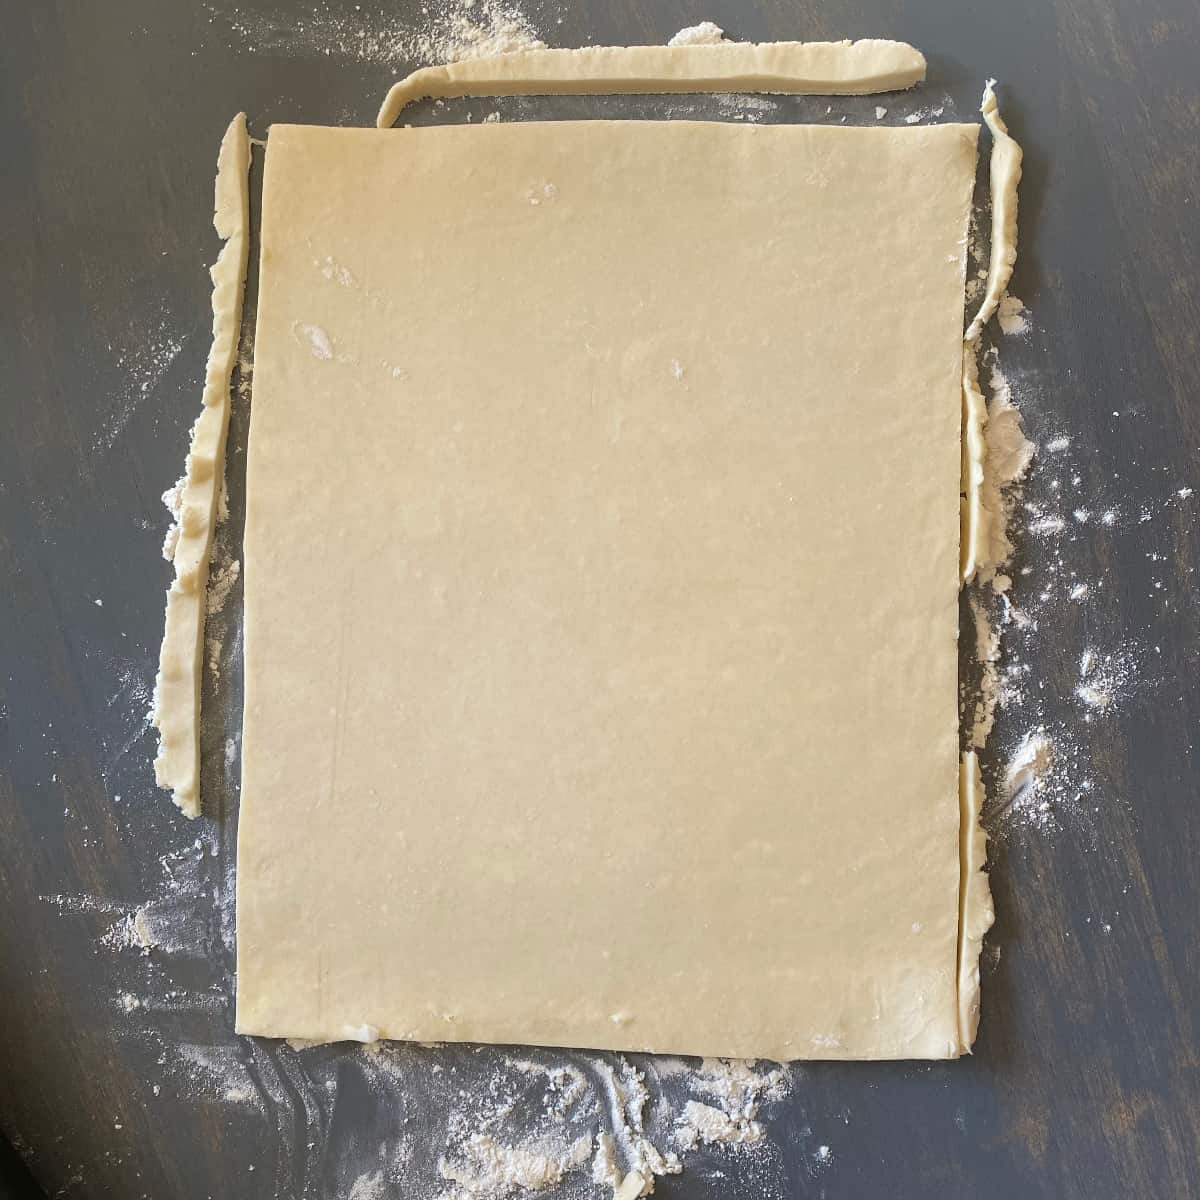
Final roll out
Take the dough out of the refrigerator, unwrap, and place on a floured surface. Allow the puff pastry dough to sit at room temperature for about 10 minutes and then roll out to ¼ inch thickness. Do not allow the dough to get too warm, so work quickly when you begin rolling out.
If you want to freeze your puff pastry for later use then put a layer of parchment paper on top and fold into thirds (letter style). Then wrap tightly in freezer wrap and place into a freezer bag. This can be stored for up to 3 months.
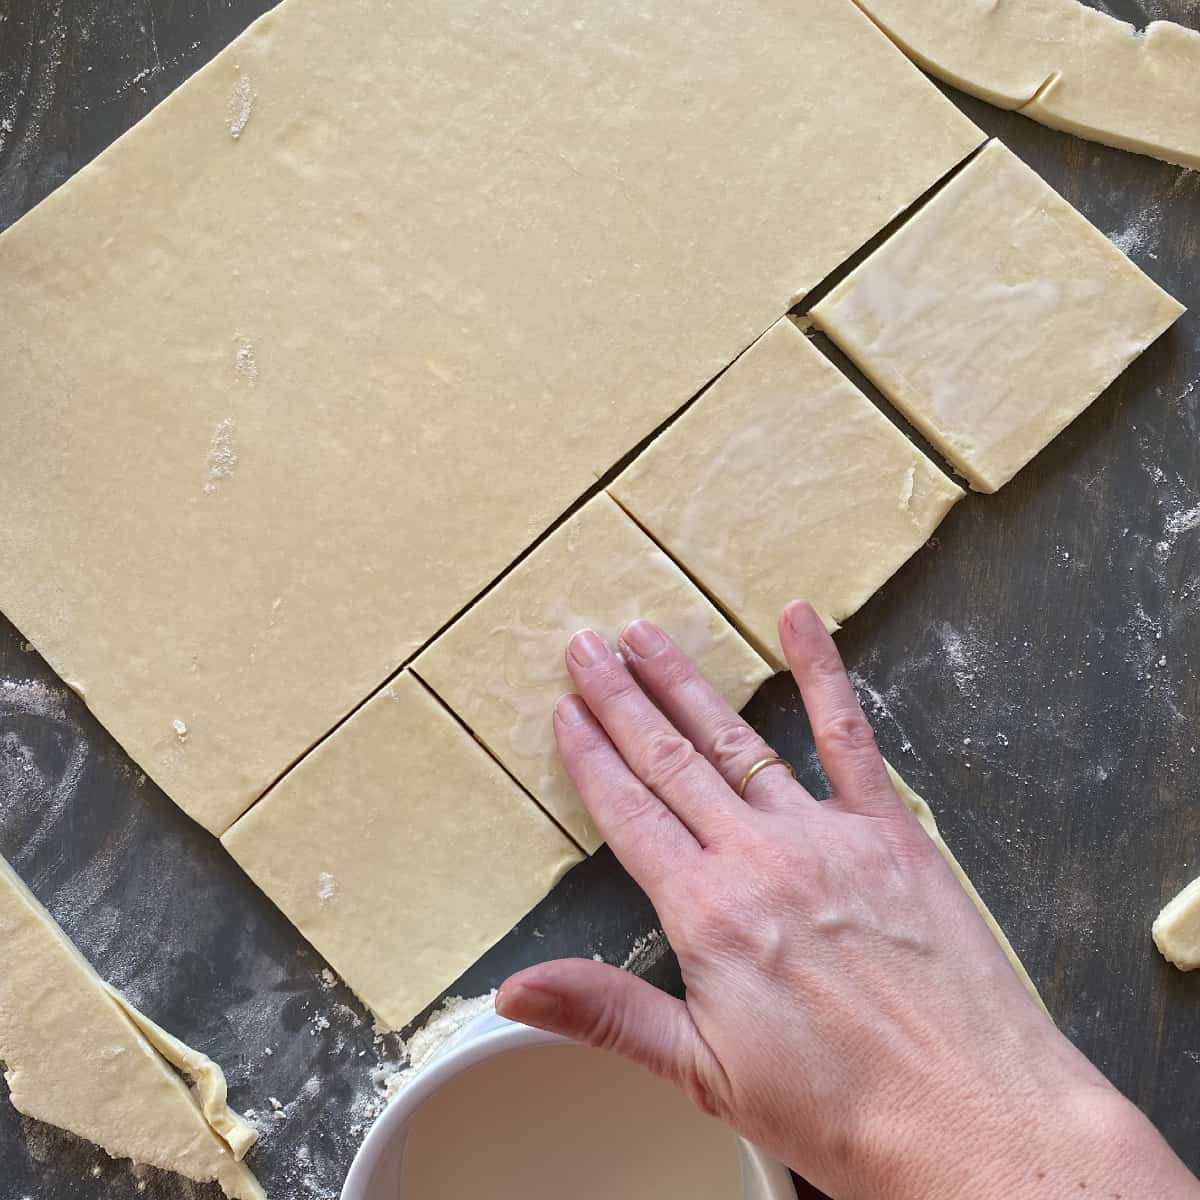
Follow instructions for the recipe you want to use the puff pastry
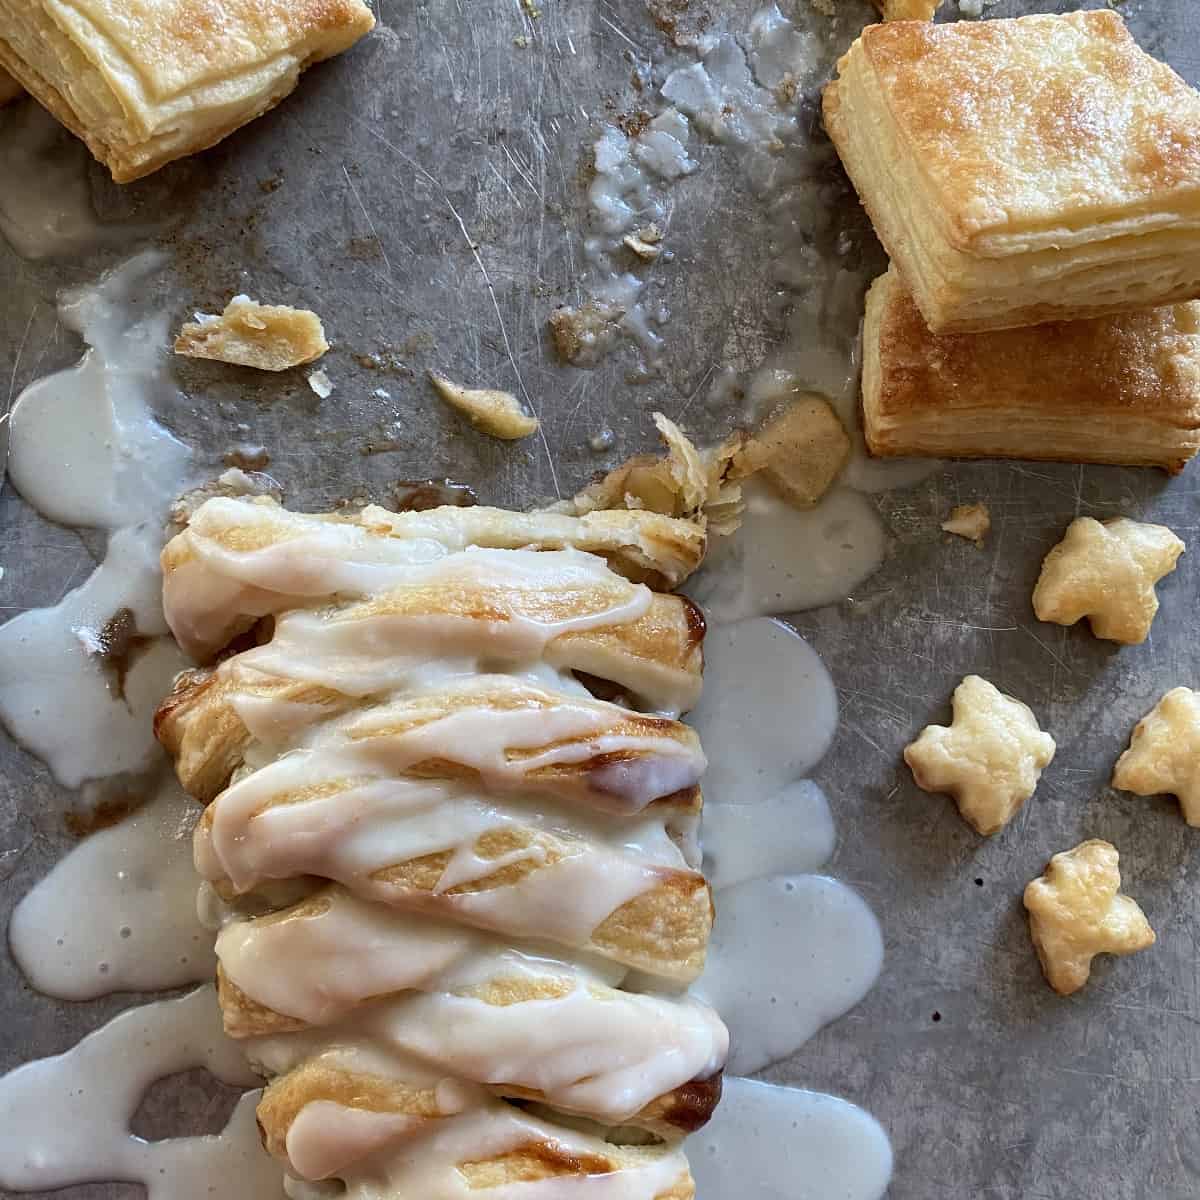
I love to cut the puff pastry into squares, brush with cream, sprinkle with a little sugar, and bake. Top with some berries and whipped cream for a yummy treat.
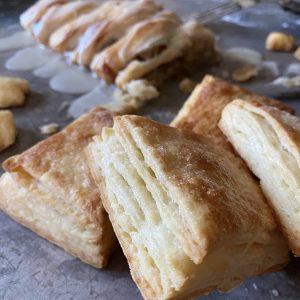
Just look at these layers!!! This pastry dough is so versatile and is guaranteed to be one of your new favorite go to recipes.
PIN THIS EASY HOMEMADE PUFF PASTRY
Enjoy!
Frequently Asked Questions
The Missouri Girl Method is the easiest and fastest way to get authentic, layered, homemade puff pastry dough without the hassle. This method involves spreading softened butter over the pastry layers, instead of rolling blocks of butter between the pastry layers. Less work with the same great results.
Use a stand mixer with a paddle attachment or just do it by hand with a pastry blender.
To help the pastry brown evenly, brush the top of the pastry with a thin layer of cream or an egg wash.
Store the dough in the refrigerator for 3-5 days. Separate the pastry layers by placing parchment paper or waxed paper between the dough layers. Wrap the dough tightly with plastic wrap to prevent the dough from drying out.
The homemade puff pastry dough can also be stored in the freezer for up to 3 months. Just prepare the dough according the refrigerator method listed above but add an additional layer of protection by then placing the dough in a freezer bag.
Classic puff pastry is a type of laminated pastry dough that is made by layering butter between layers of dough. It is very time intensive. Rough puff pastry is also laminated pastry dough that is made in a fraction of the time with less labor. It yields results that is nearly indistinguishable from classic puff pastry.
Easy Puff Pastry Recipe [Rough Puff Pastry]
Equipment
- large food processor (recommended but essential)
- kitchen scale (recommended but not essential)
- Rolling Pin
Ingredients
Butter layer:
- 6 tablespoon salted butter I use Hiland Dairy
Puff pastry dough
- 266 grams (2 loose cups) all purpose flour (fluff, scoop, and level method if using a measuring cup)
- 4 grams (½ tsp) salt
- 280 grams (1 ¼ cup) salted butter I use Hiland Dairy
- 100 grams (½ cup) ice water
Flour for rolling out the dough:
- 2-3 tablespoon all purpose flour
Instructions
Prepare and chill the butter:
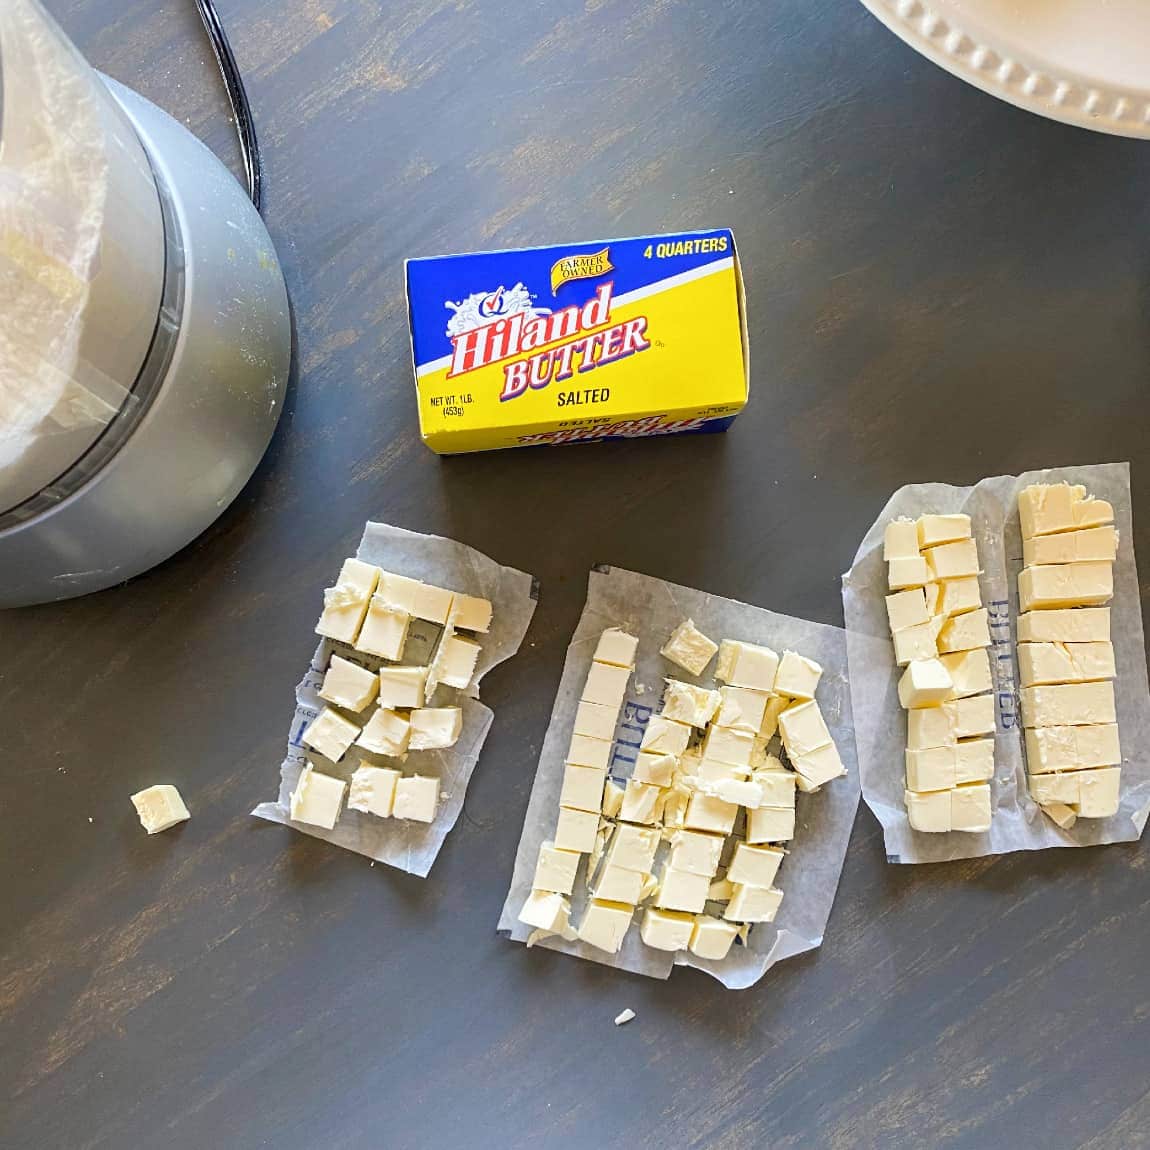
- Remove 2.5 sticks of butter (280 grams) from the refrigerator and cut each stick of butter into 32 cubes (each tablespoon of butter cut into 4 cubes) and place in a freezer safe plastic dish or bag.
- Place the butter cubes in the freezer until ready to use.
Prepare the butter layer
- Place 85.6 grams (6 tablespoon butter) in a small microwave safe bowl.
- Microwave on DEFROST for about 30 -35 seconds (time may vary per microwave) to barely soften the butter. You don't want there to be any melting occurring.
- Set aside.
Make the pastry dough:
- Add 2 cups of water and 1 cup ice to a medium bowl. Set aside.
- Add the flour and the salt to a large food processor.
- Remove the butter cubes from the freezer, add to the food processor and put on the lid.
- Pulse about 20 times until a course meal is formed with pea sized chunks of butter remaining.
- Measure out 100 grams of water from the bowl of ice water.
- Turn the food processor onto the dough setting (continuous) and slowly add the water in a steady stream to the running food processor.
- Continue to let the food processor run until the dough comes together into a ball on one side of the food processor
- Place 1 tablespoon of flour on a clean, cool work surface and spread out into an even layer.
- Turn out the dough onto the floured work surface and quickly knead the 2 tablespoon flour into the dough.
- Set the dough aside, place another 1 tablespoon flour on the work surface, and roll out to ¼ inch thickness.
- Spread 4 tablespoon softened butter in a thin layer all over the top of the dough sheet using an offset spatula or the back of a spoon.
- Trim the jagged edges off the dough so that it makes a symmetrical rectangle.
- Fold the dough in half length wise. Spread 2 tablespoon butter into a thin layer on top.
- Then fold the dough into thirds (letter style).
- Wrap the dough tightly in plastic wrap and place flat in the refrigerator.
- Chill for 1 hour.
- Place 1 tablespoon flour on a clean work surface and spread into a thin layer.
- Remove the dough from the refrigerator, unwrap, and place on the floured surface.
- Roll out to a thickness of ¼ inch.
- Use and bake the rough pastry according to your recipes directions. For 2 inch by 2 inch puff pastry squares I recommend brushing the top with cream or an egg wash and baking at 375 degrees for 25-27 minutes. Make sure the pastry dough sheet are VERY cold prior to baking so you may need to place them back into the refrigerator for up to 20 minutes prior to baking.
Sarah says
Wow! I have never been brave enough to attempt my own puff pastry, but this post makes me think I could do it! Your instructions are great and the puff looks amazing!
Melinda says
Thank you Sarah! Yes, you ABSOLUTELY can make puff pastry. Once you do it, it’s surprising how little hands on time is required.
Amanda says
I love this recipe!!! I’ve only started “playing with dough” in the last year and half. My Dad raved to his sister (my Aunt) how awesome my turnovers were and without hesitation she requested the recipe. Which of course I shared your link! Only thing is she is strictly vegan. Is there a way to do this with just as amazing results- but vegan?
Melinda says
So glad you enjoyed it. I have not tried the recipe using vegan options so I’m not sure how it would turn out.
Nakisha says
This dessert sounds good.
Melinda says
Thank you Nakisha!
Alyssa Hixenbaugh says
I love the directions and instructions on creating this recipe! Puff pastry can be a daunting task to make but this makes it simple!
Melinda says
Thank you Alyssa! Mission accomplished!!!
Colette Zaharko says
I love puff pastry. They are so popular in my country (Madagascar). I love how detailed this recipe is. I can’t wait to make it!
Melinda says
Thank you Colette! And thank you for letting me know about the popularity of puff pastry in Madagascar. I love hearing about food preferences in other countries and I had no idea!
Pat says
I use this to make Easy Peasey British Sausage Rolls! Also, for Apple Pies